My Mobile Office Setup: A Guide to Pain-Free Remote Work

I spend a lot of time on a computer, and as a result, my keyboard and workspace are incredibly important to my comfort and pain levels. This only gets worse when I travel for extended periods of time, so finding “travel” version of my setup has become critical.
Here’s the list of items I’ve used over the last 5 years, that have performed well on the road along with notes on what they do well and not so well.
Cheat Sheet Gear List
Here’s all the gear referenced, and in full transparency the links are amazon affiliate links. All proceeds go to buying more gear for more reviews.
- Rooster Travel Laptop Stand
- 17-inch portable Monitor
– Smaller Portable Monitor - iClever Keyboard
- Magic Mouse
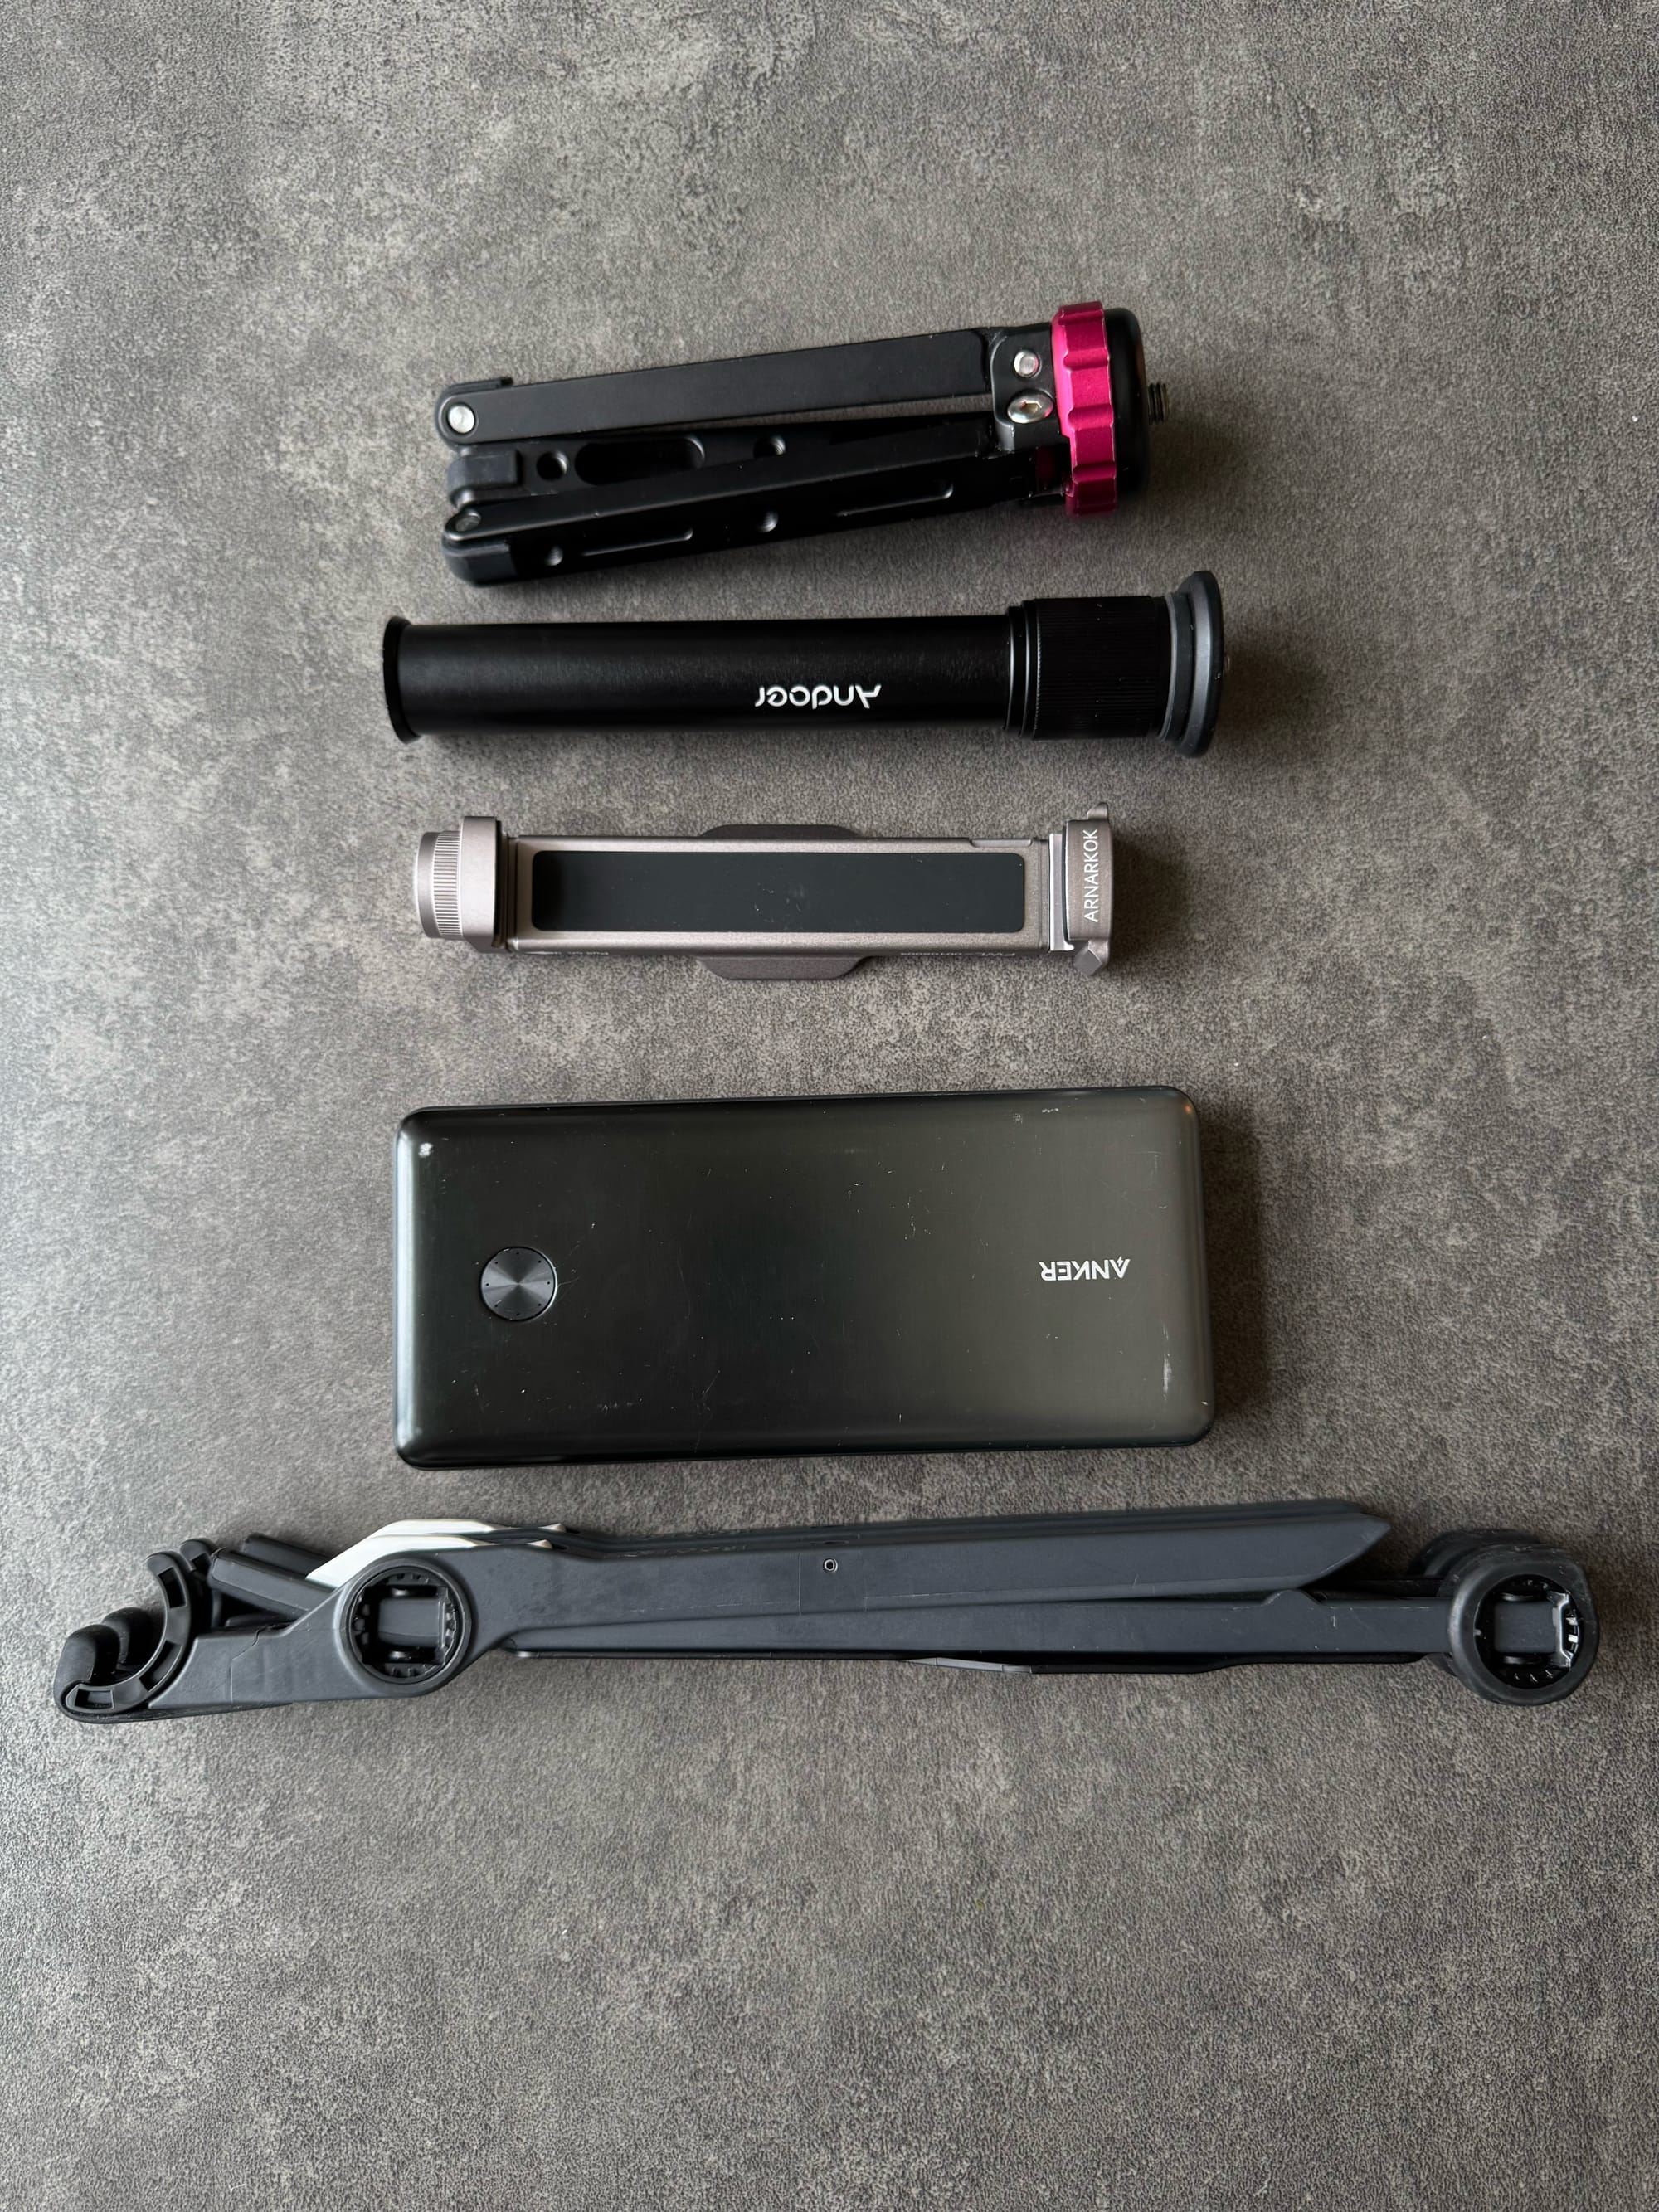
- Tabletop Tripod foot
- Tripod extension pole
- Tablet / Monitor mount
- Tripod Ball Head
- Magnetic iPad Stand
- Ethernet - longer / flat cable
- Satechi Charging Dock
– Anker Charging Dock (only 2 ports can charge laptop) - Beryl Travel Router
- Anker Laptop Powerbank
The stand
This is the most essential piece of equipment in my setup. Nothing relieves neck pain and shoulder pain from working on a laptop like getting the screen higher and further away so you can use a keyboard and mouse.
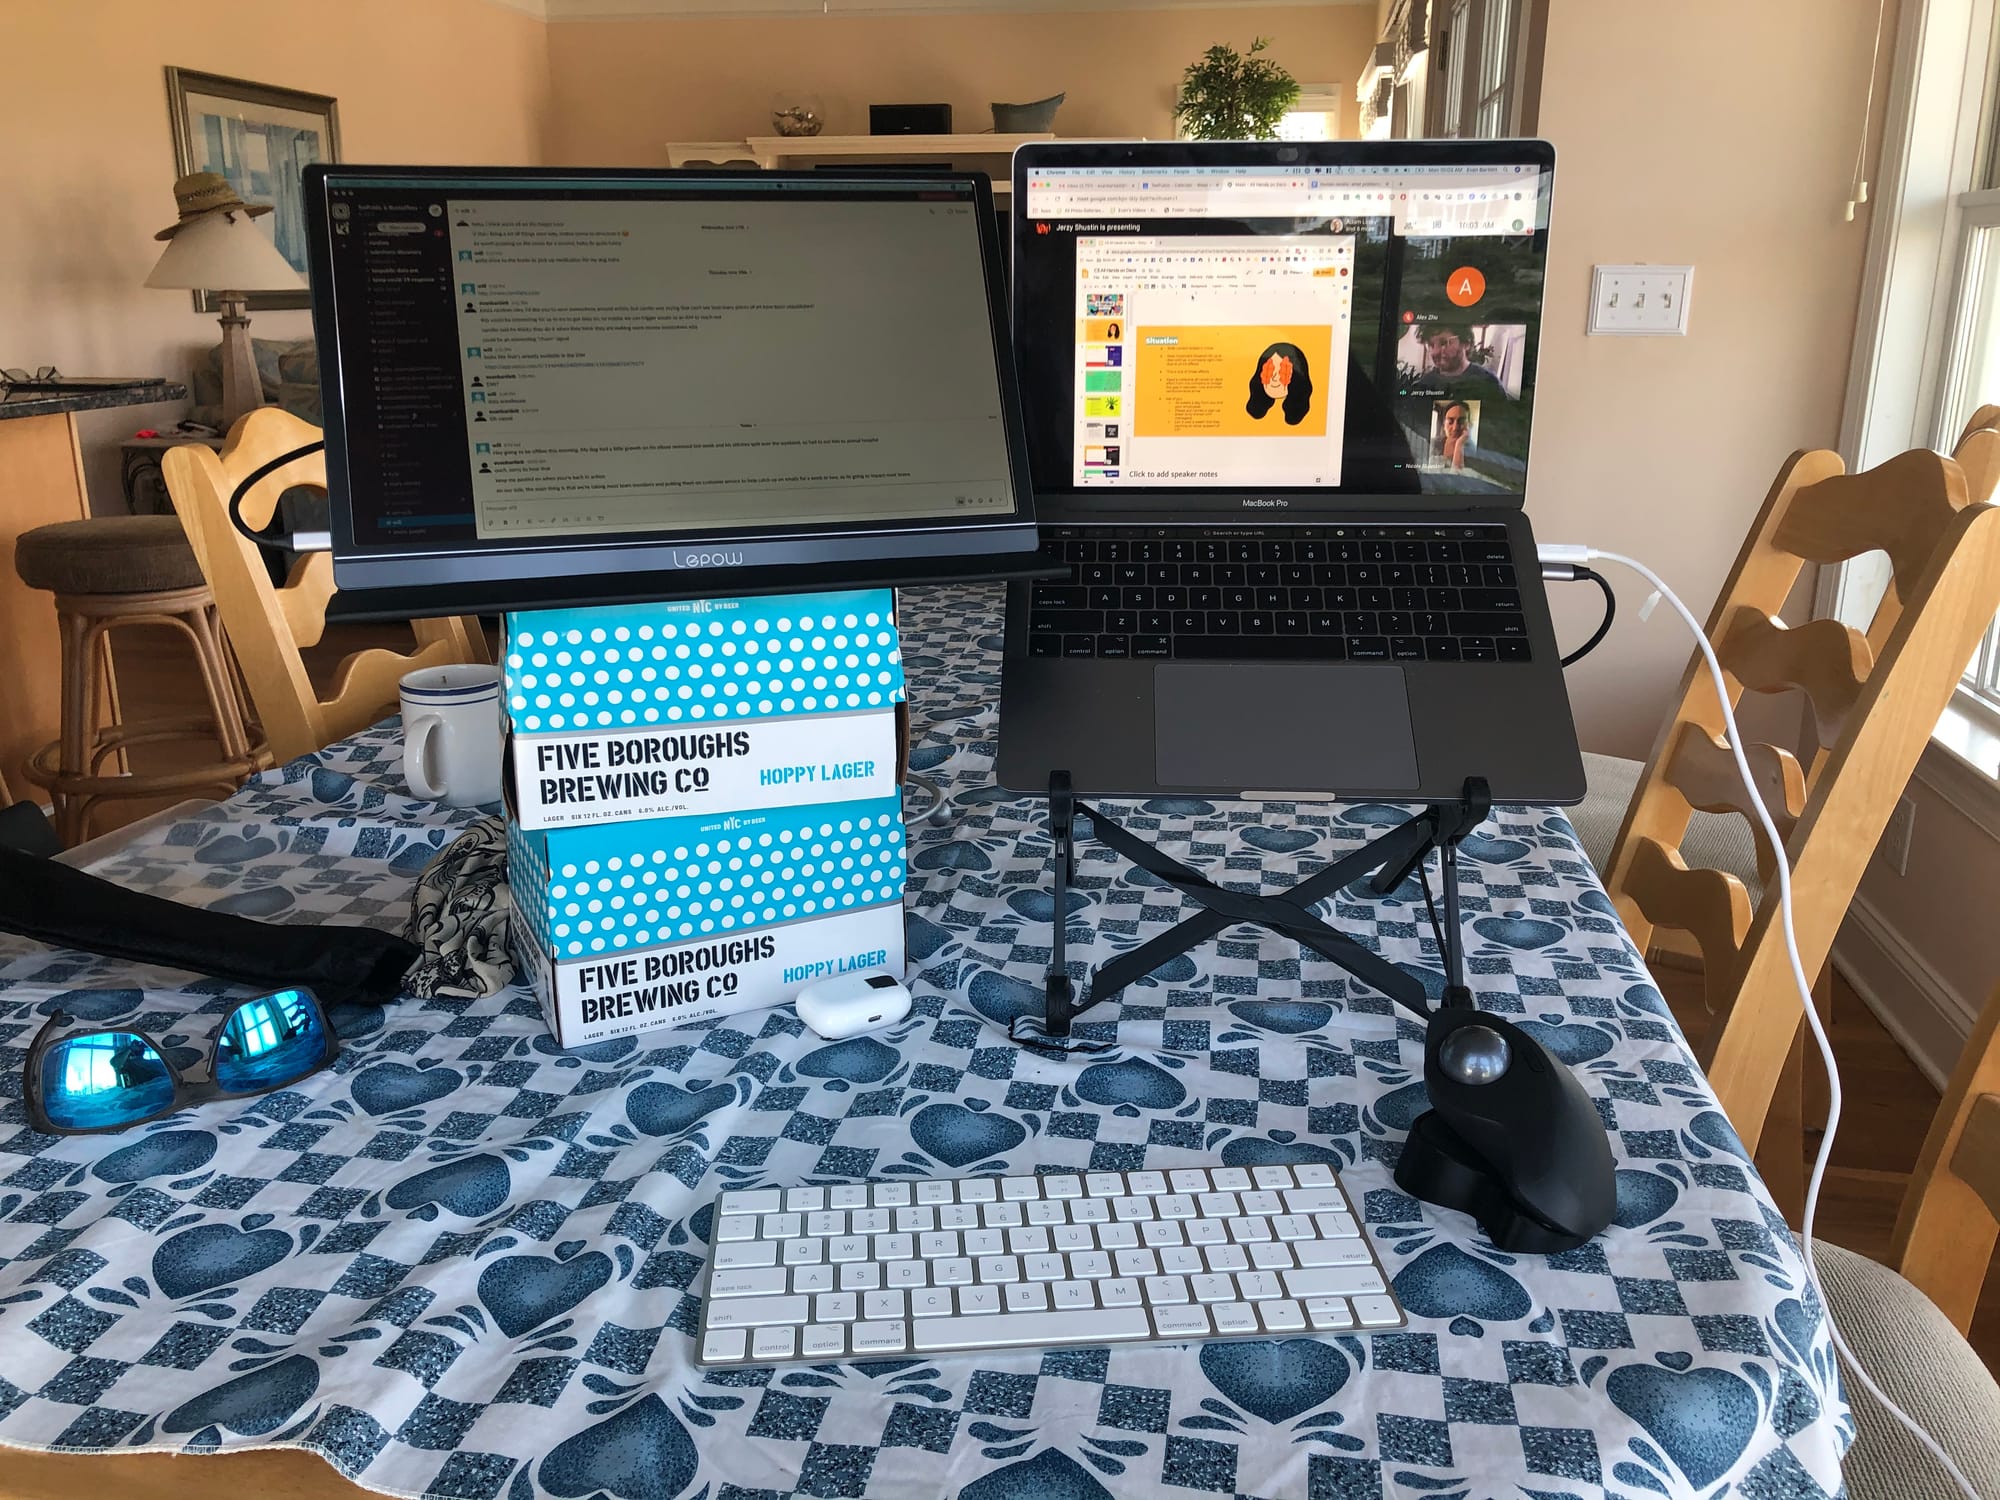
I’ve tried various cheap options, but nothing comes close to the adjustability and flexibility of this Rooster travel laptop stand. It packs down incredibly small, and it’s light, so you never mind taking it with you. It’s extremely adjustable so it works at various desks and chair heights. This one always travels with me.
Second Monitor
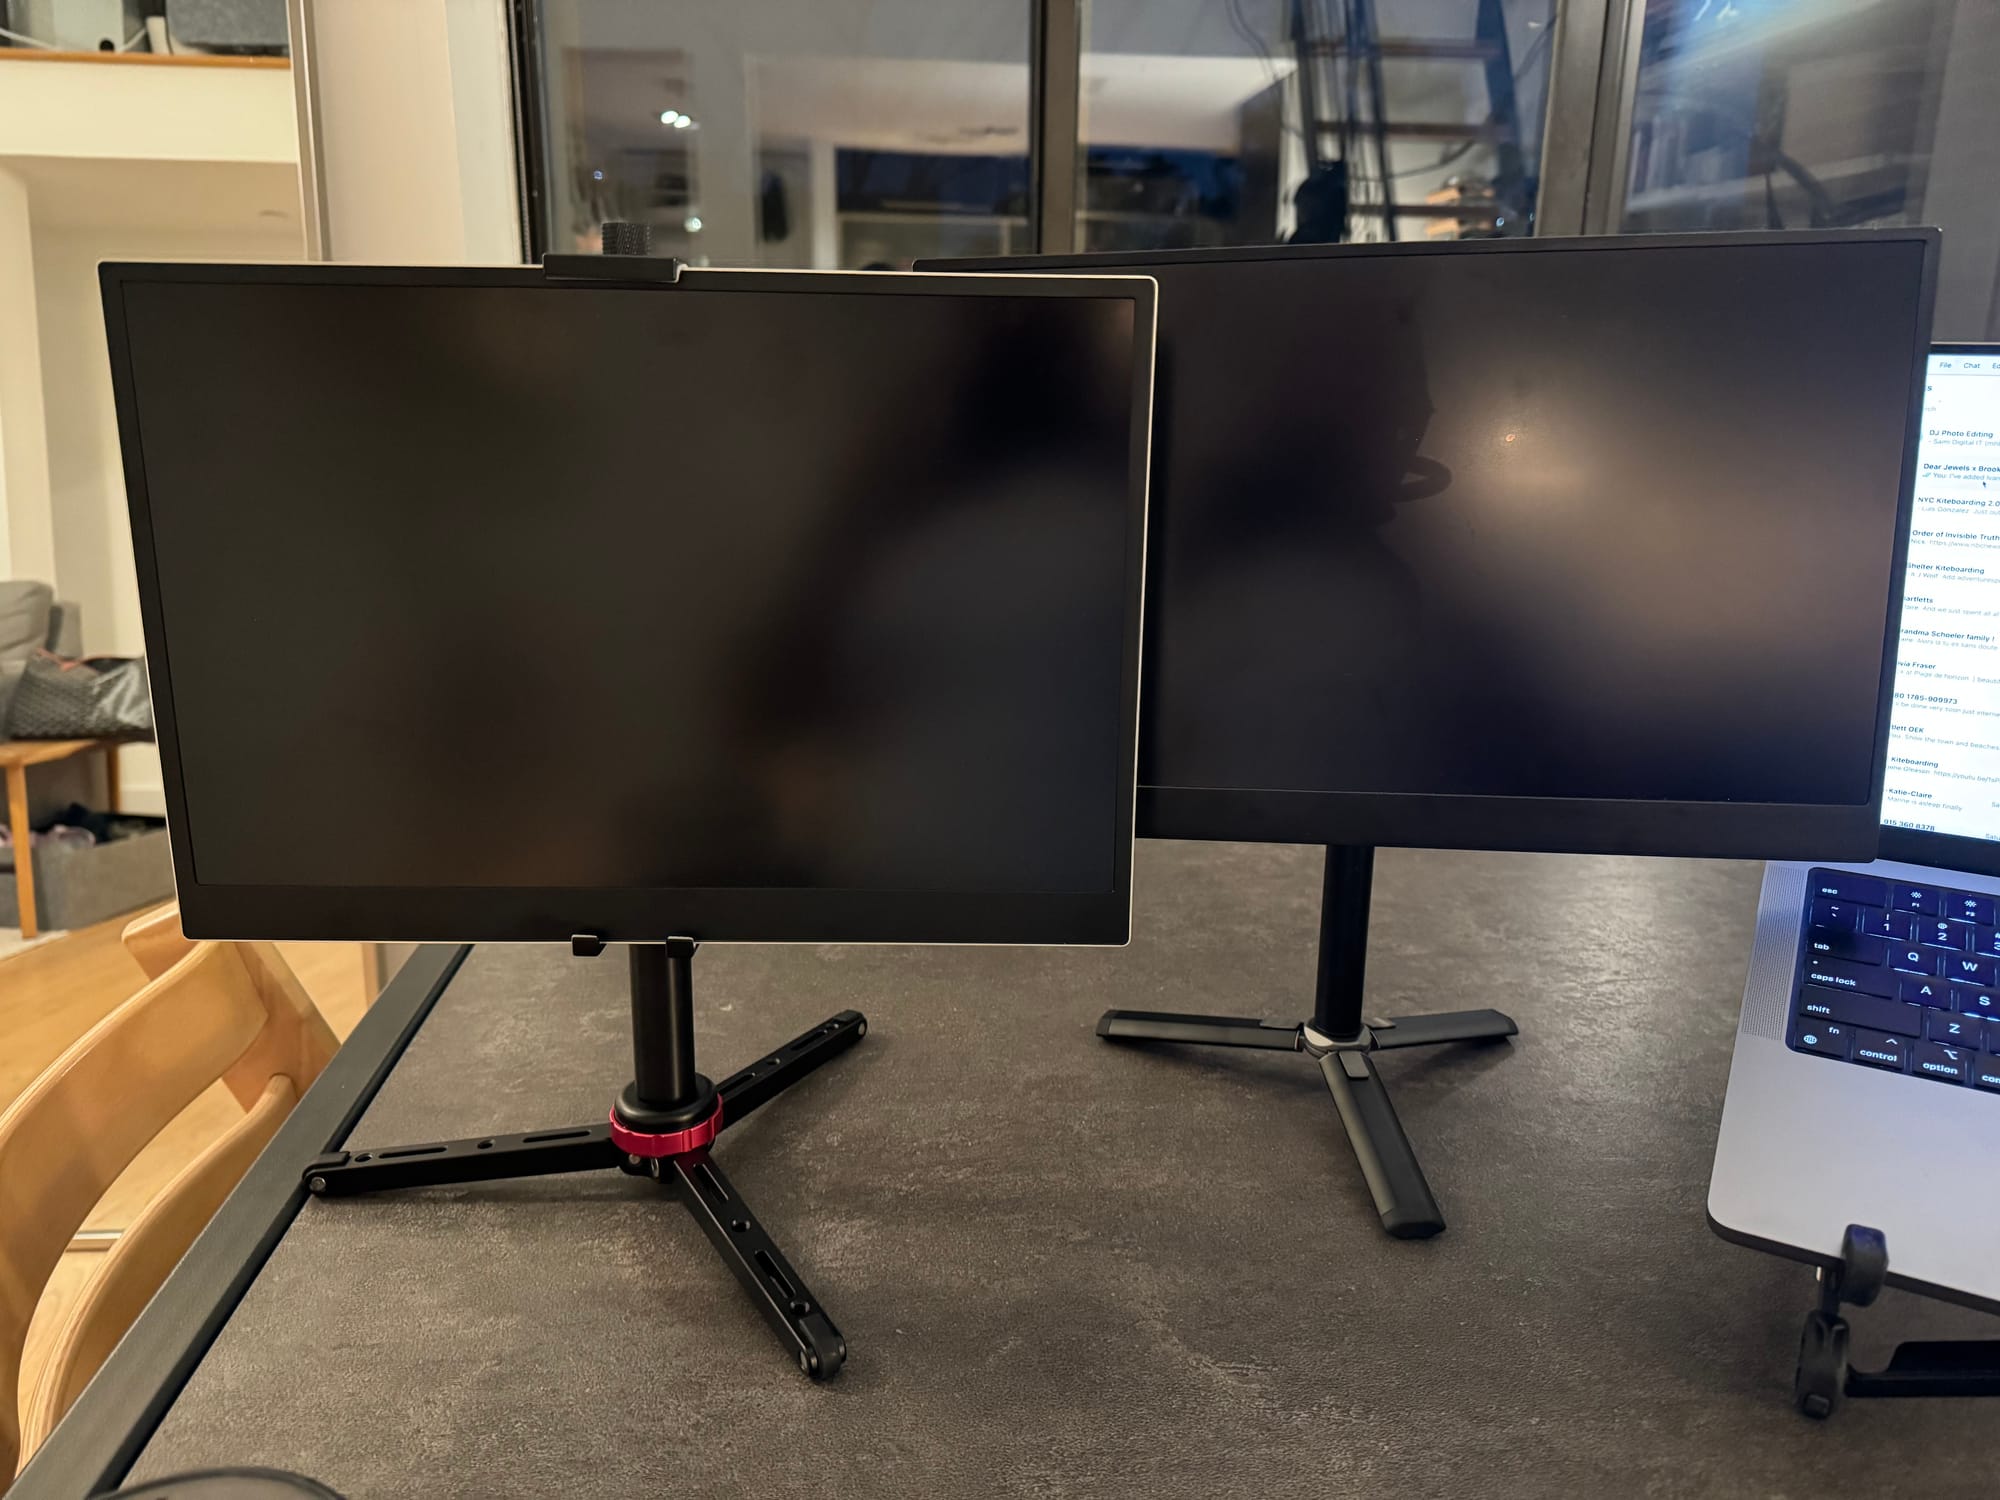
While you can certainly get by with the rooster stand and just a laptop when you need to travel extra light, having a second monitor really makes this setup feel more like a trust office setup. Being able to work off two side by side monitors opens up quite a bit of productivity for everything from spreadsheets to video editing.

This is where a portable monitor comes in. The real key is finding something bright enough. There are plenty of cheap options on amazon, and brightness is what makes most of them unusable. Subsequently, you need to decide whether you want to prioritize to power the monitor exclusively from your laptop, or whether you’re ok having a power cable go to your portable monitor and then pass through power to your laptop.
My wife has the LG Gram (which doesn’t need external power), and I have the larger 17-inch EVICIV 2k monitor that needs to be plugged in.
I noticed a large difference between 1080 resolution and 2k resolution. 1080 looked pixelated and almost blurry, so I would not go lower than 2k. 4K at the time was as expensive as buying a full-size monitor, so it wasn’t worth it for me to spend that on a portable monitor that I’m not using 100% of the time.
The other factor that I would recommend you really pay attention to is the case that the monitor comes in. The monitors come in odd dimensions so it’s difficult to find a slim case that will actually protect the monitor.
Monitor stand
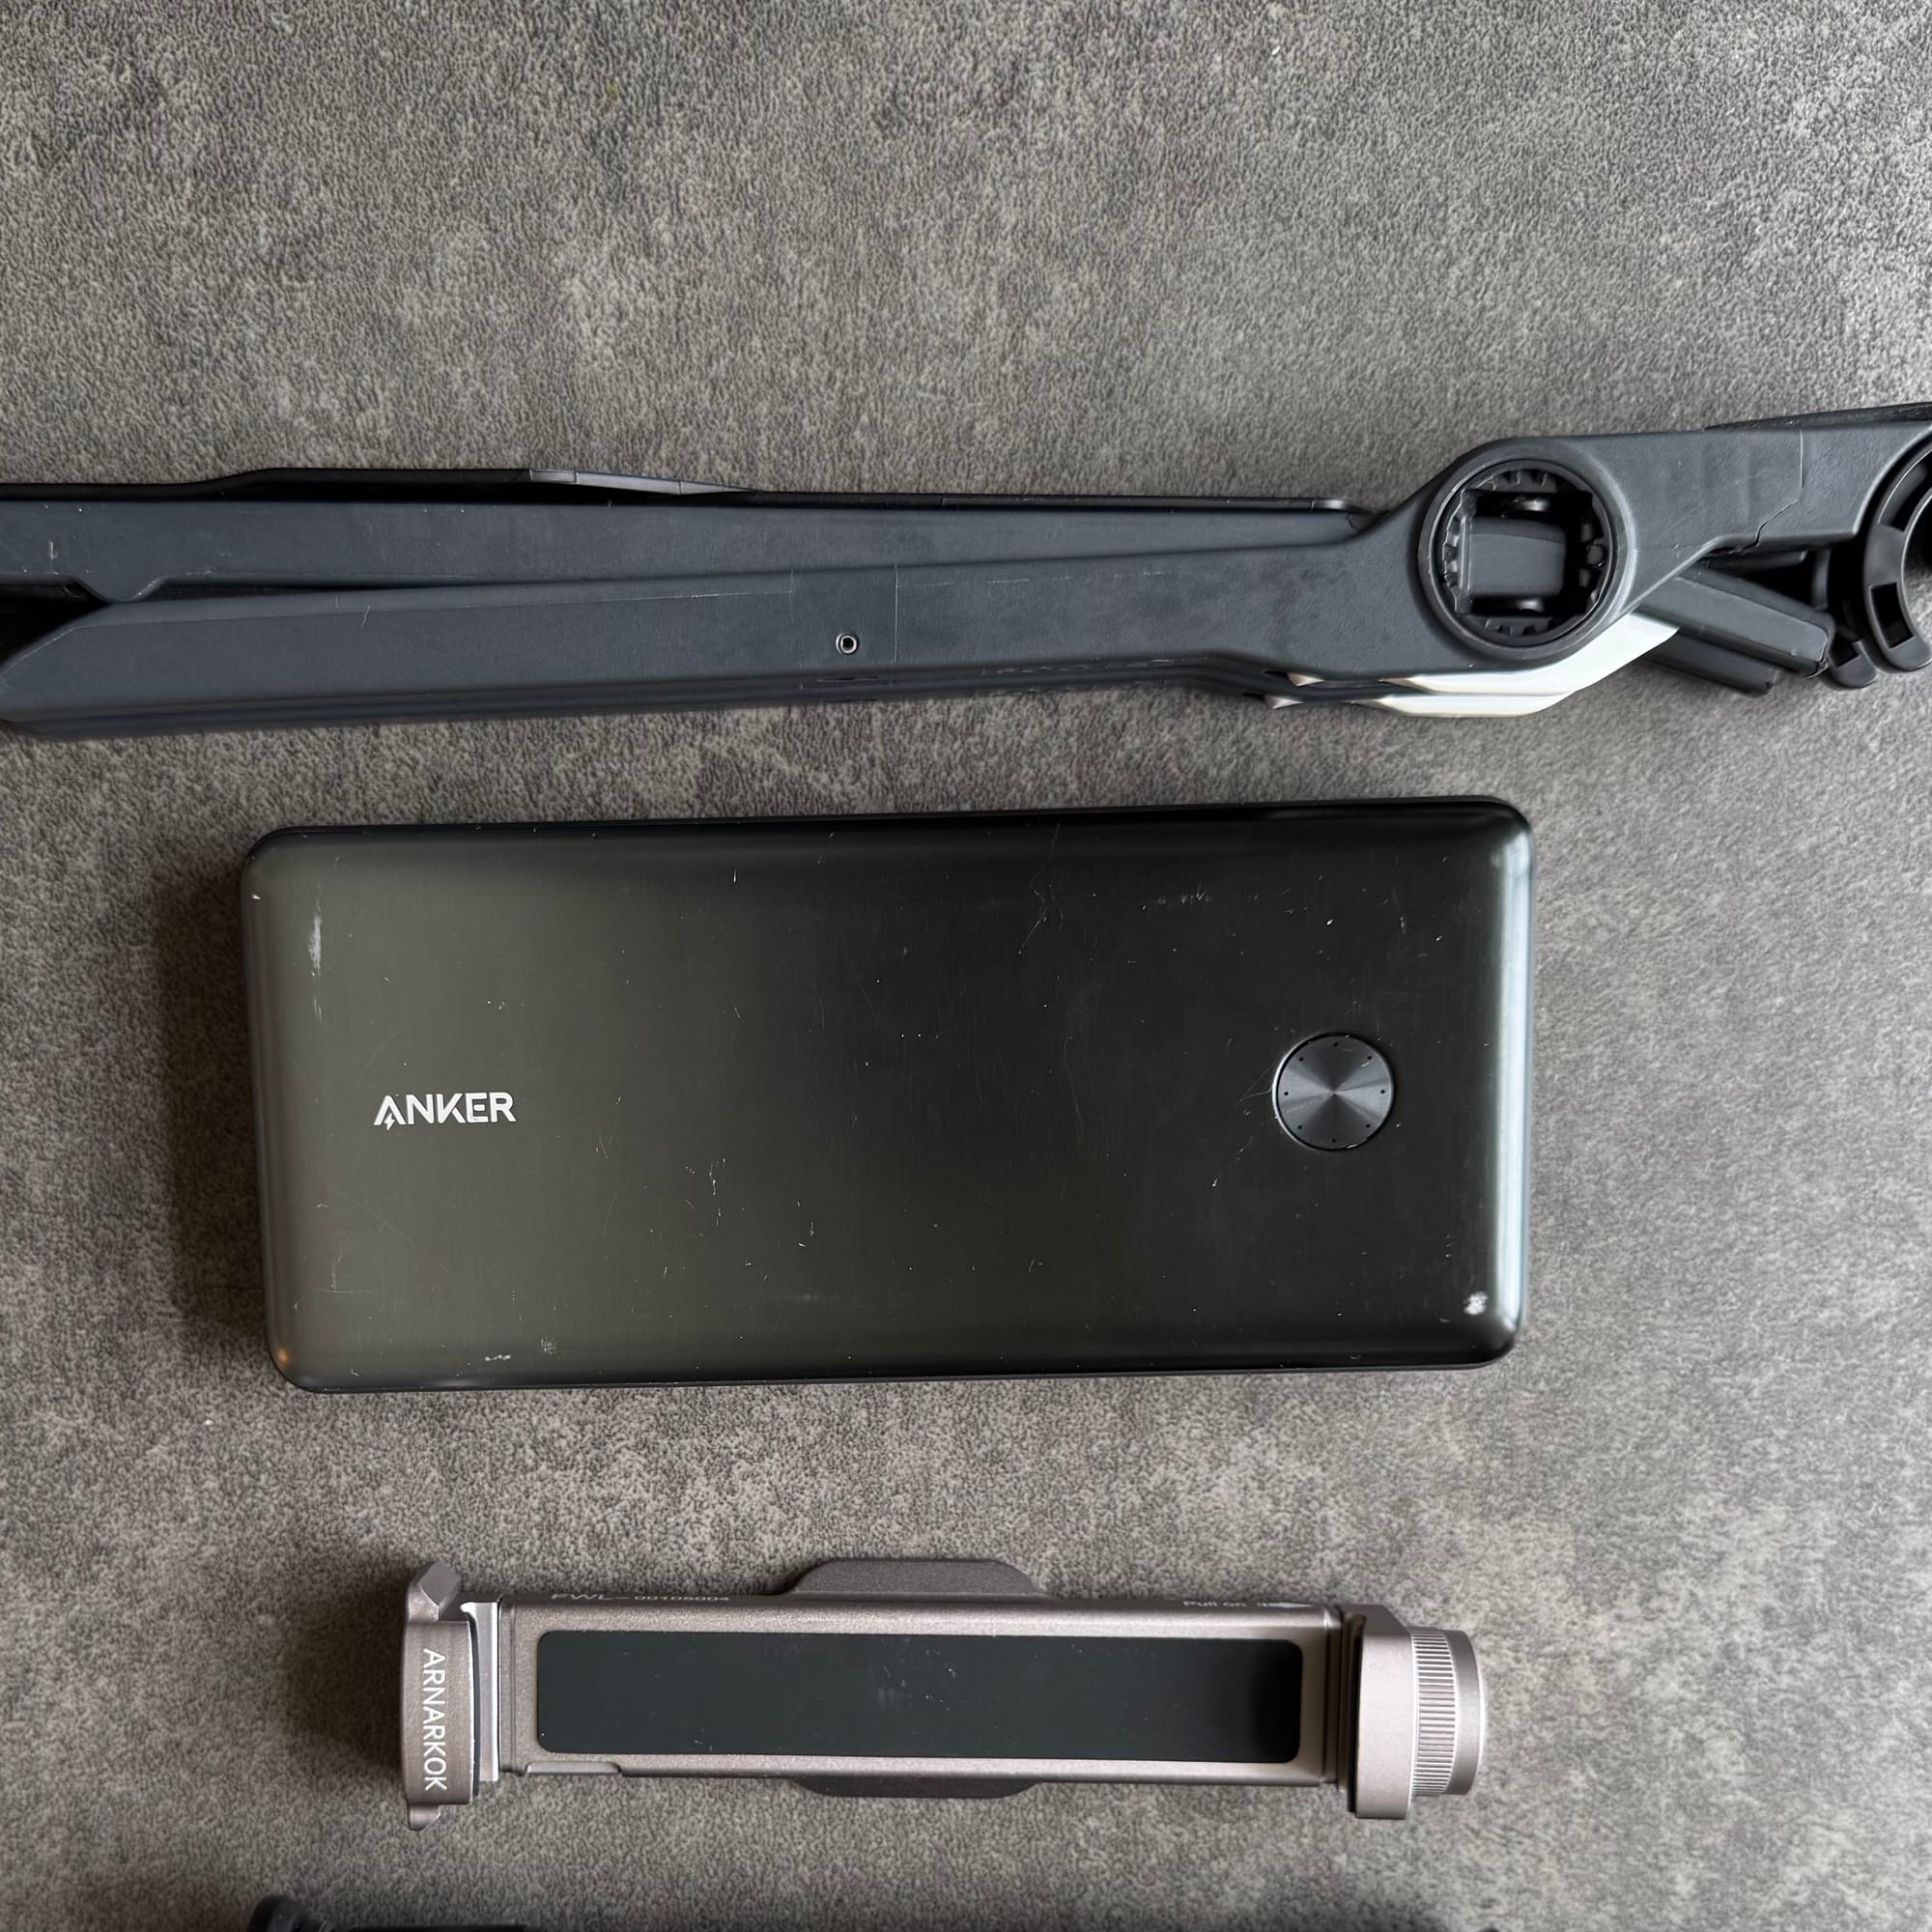
So you can use these external monitors by propping them up with their folding cases, and stacking them on books or beer cases. But at some point you might want a little more height and angle flexibility. This is where the portable monitor stand comes into play. I typically have camera equipment with me, so this is why I went in the direction of using tripods, tripod extension poles, and an extremely flexible iPad clamp.
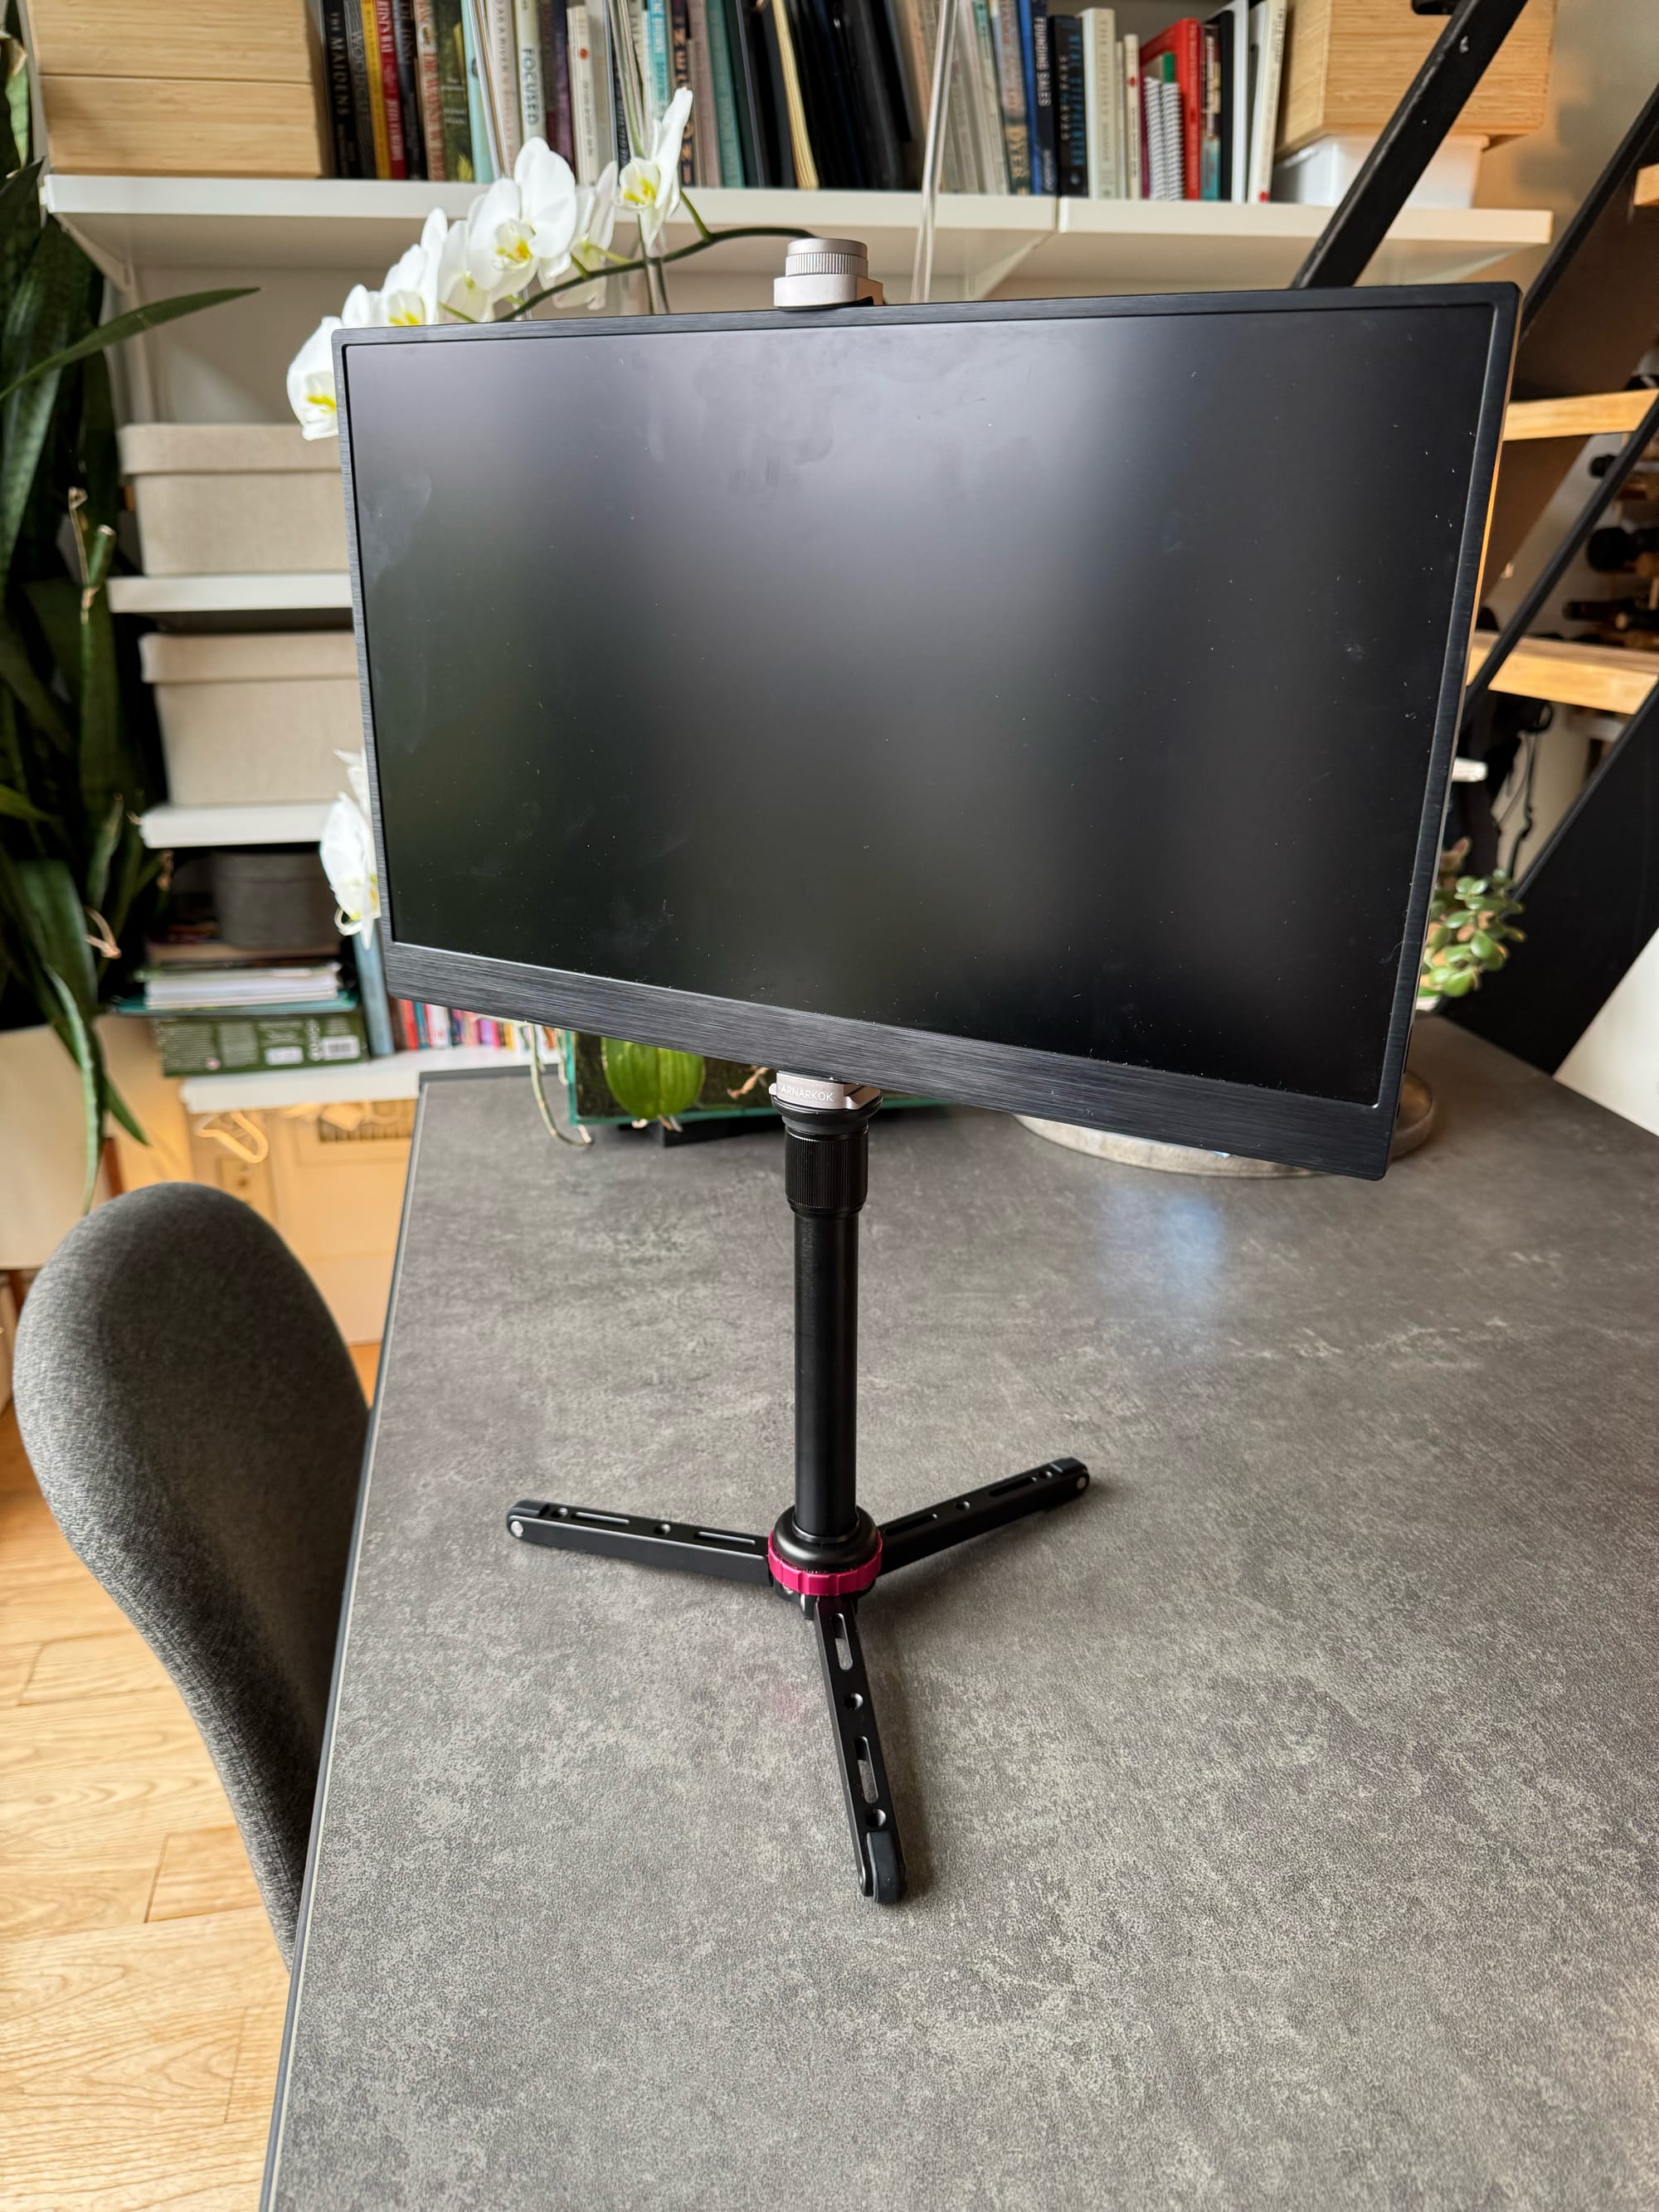
The key to getting the right height is getting a pole that is short enough when collapsed, yet still has the range that you want when extended. Be sure to account for the tripod head if you’re going to want to adjust the angle. Adding in a head will increase the height of the whole unit.
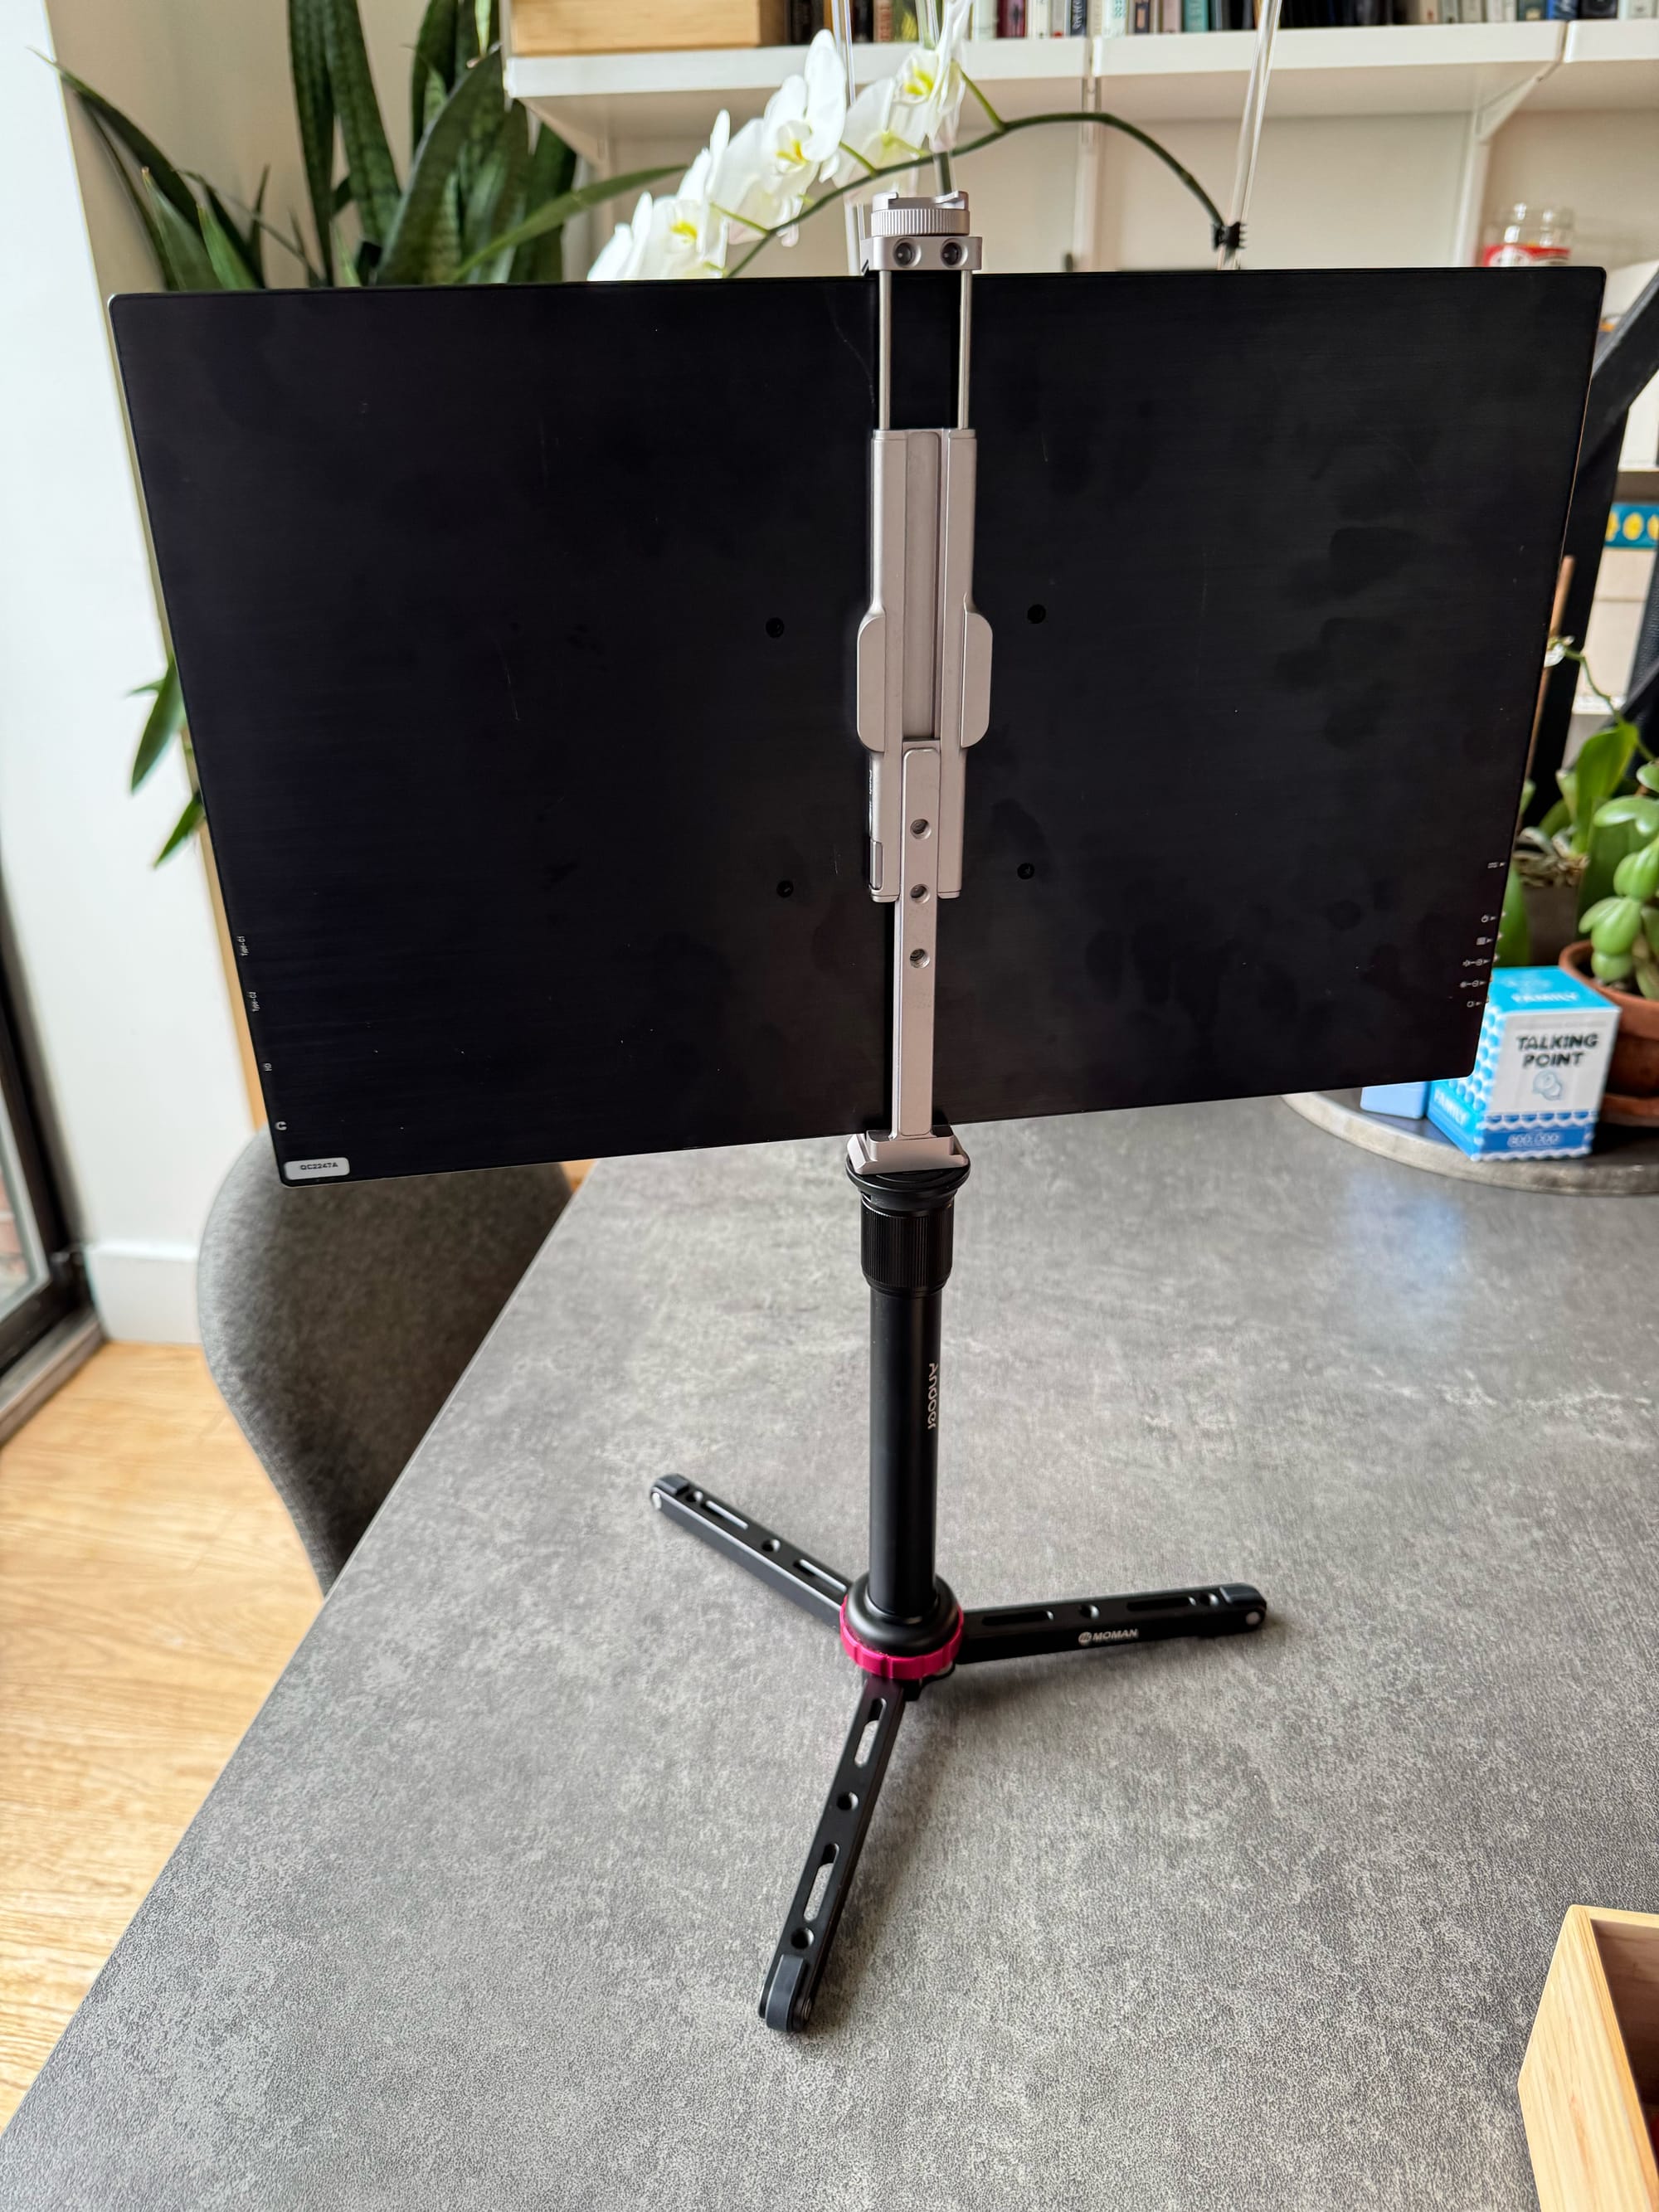
The tablet monitor mount was also a key piece to the puzzle. Many tablet mounts won't work, or don't feel solid enough to trust to support a monitor. This Arnarkok tablet mount is very high quality, and has a large range of adjustability so it’ll work with just about anything you want to mount. It also has 1/4 20 and 3/8s mounts on the bottom so it’ll mount to more tripod heads.
I purchased an all-in-one monitor stand kit to start, and just found it flimsy and not very confidence inspiring. Buying the separate components is pricier, but the parts will basically last forever.
iPad Stand
Some of you may already have an iPad and want to use that instead of an external monitor. The wireless screen extension from apple has gotten pretty usable. You could use the stand above, it will work for both externals monitors and iPads, that's the benefit of the clamp mount.
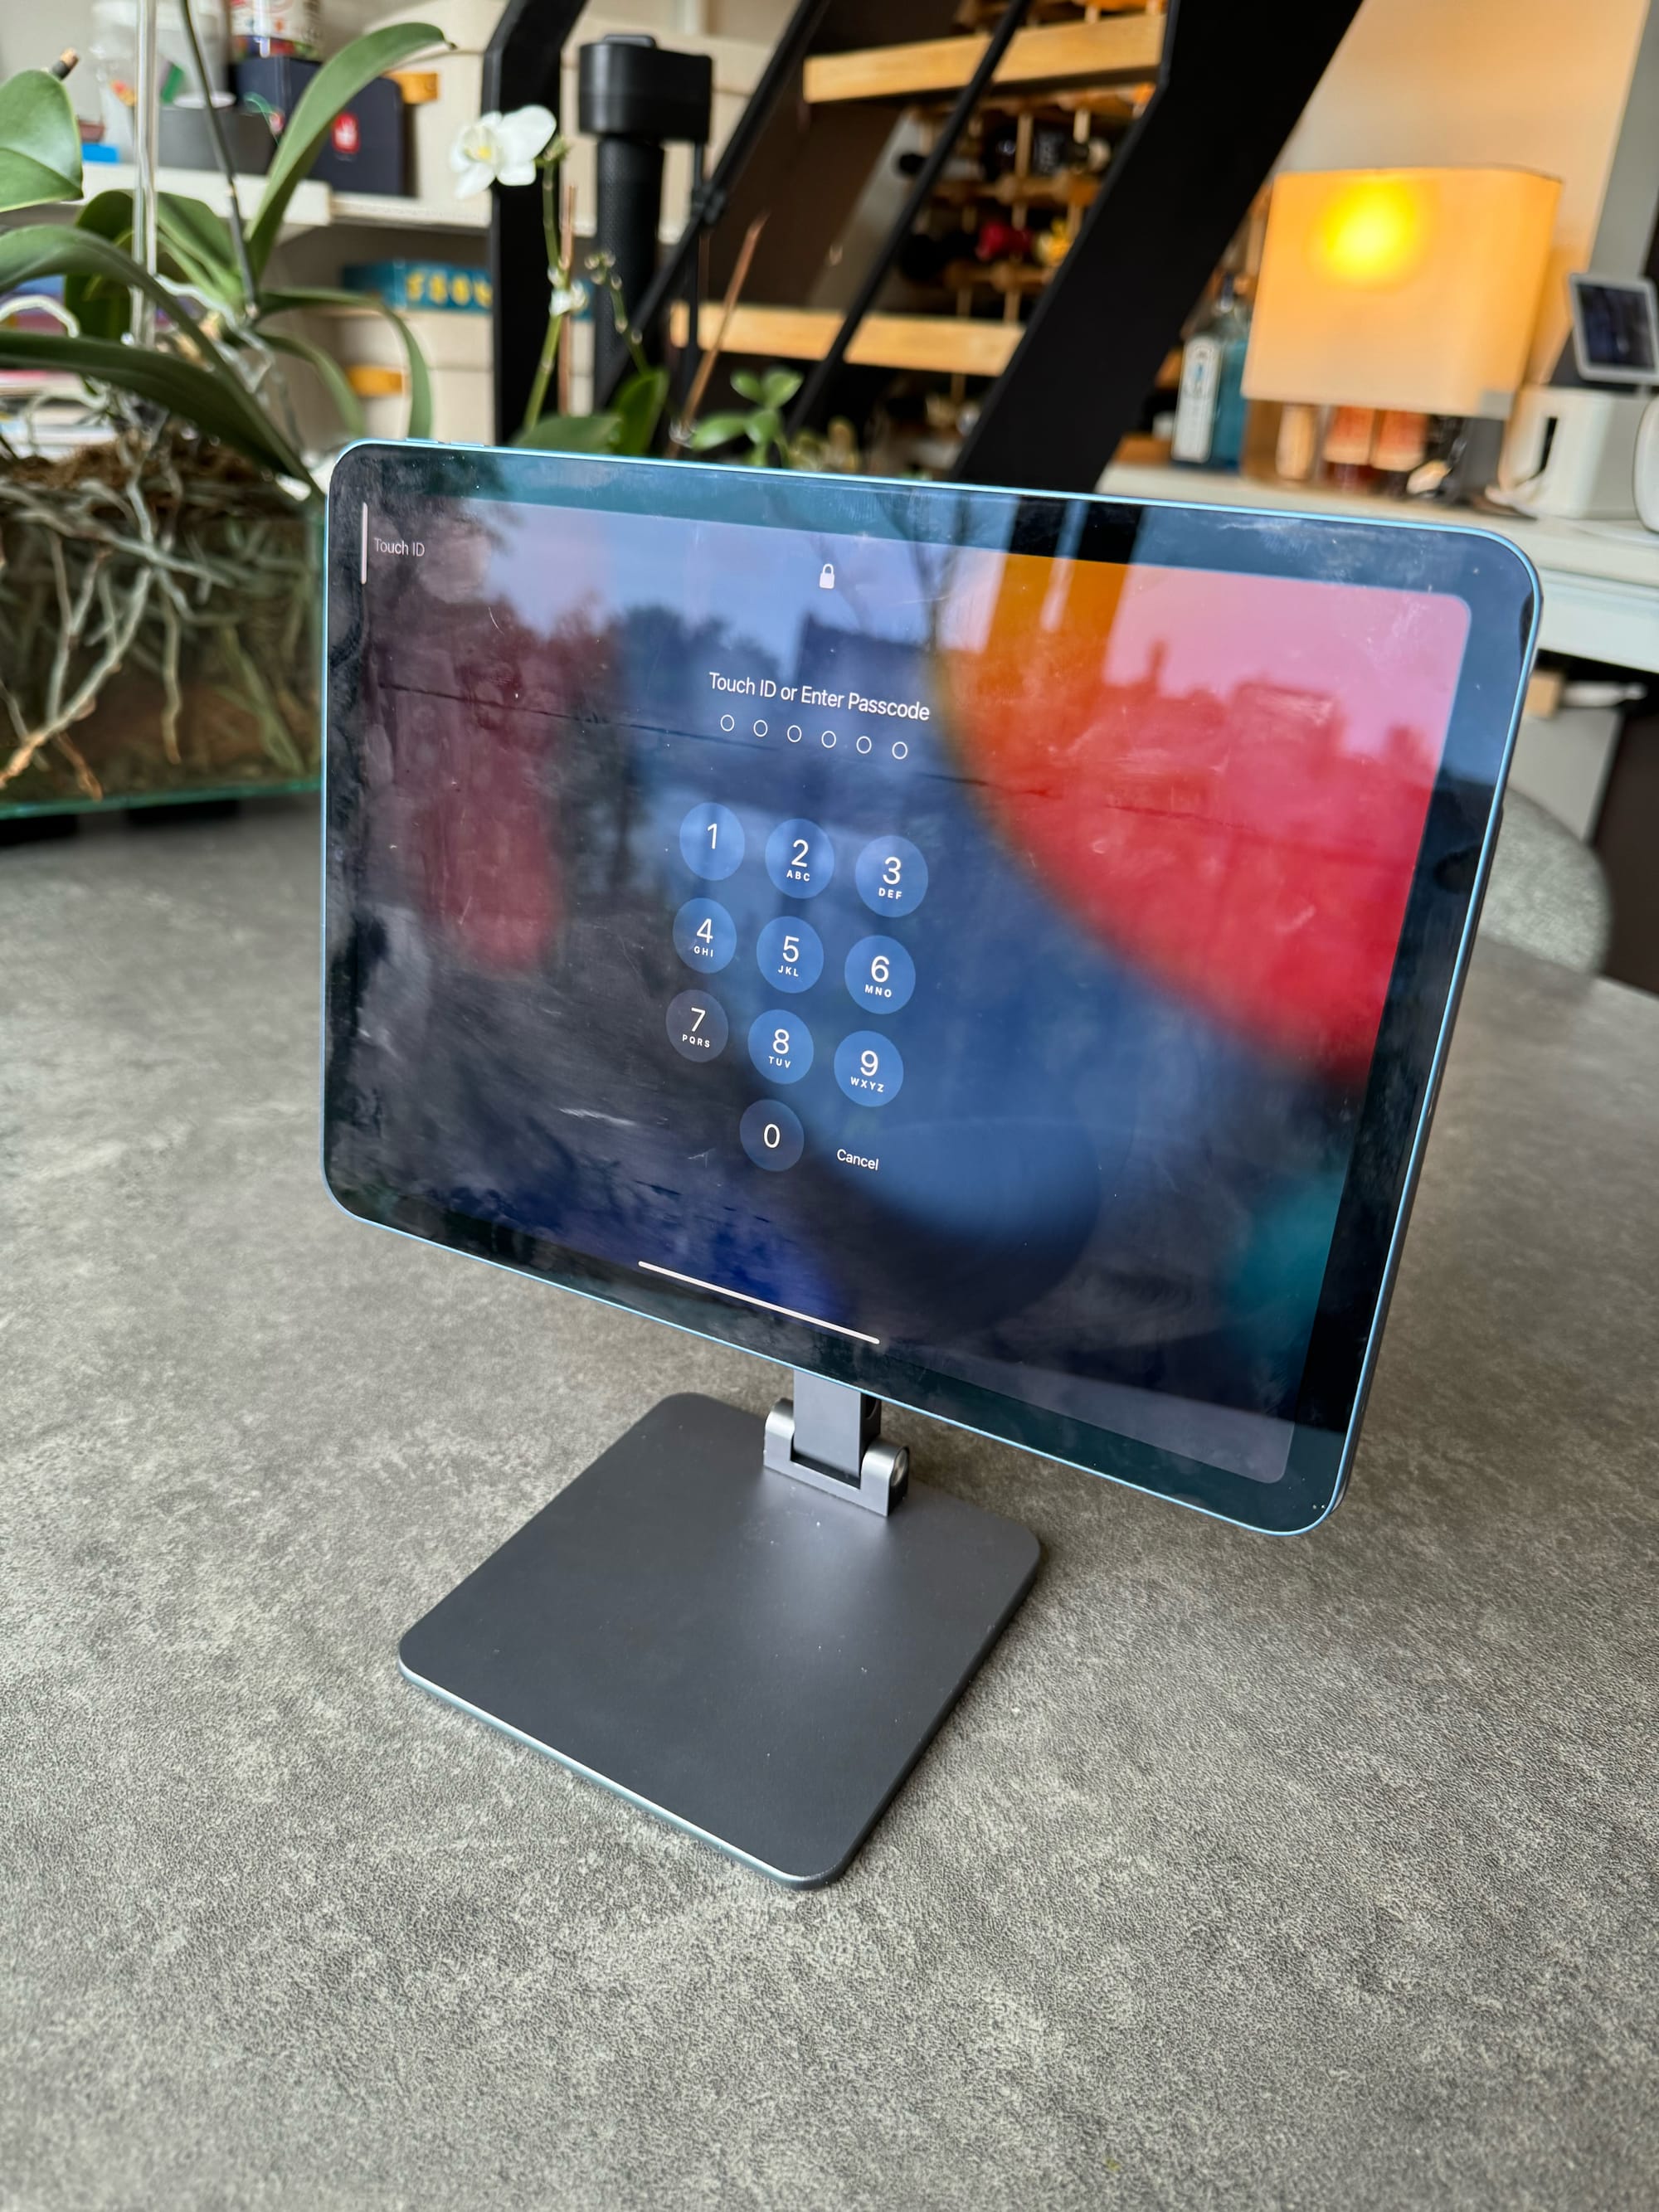
For those of you that just want to use an iPad, and value quickly grabbing the iPad to draw on it, a magnetic stand might be a practical option.
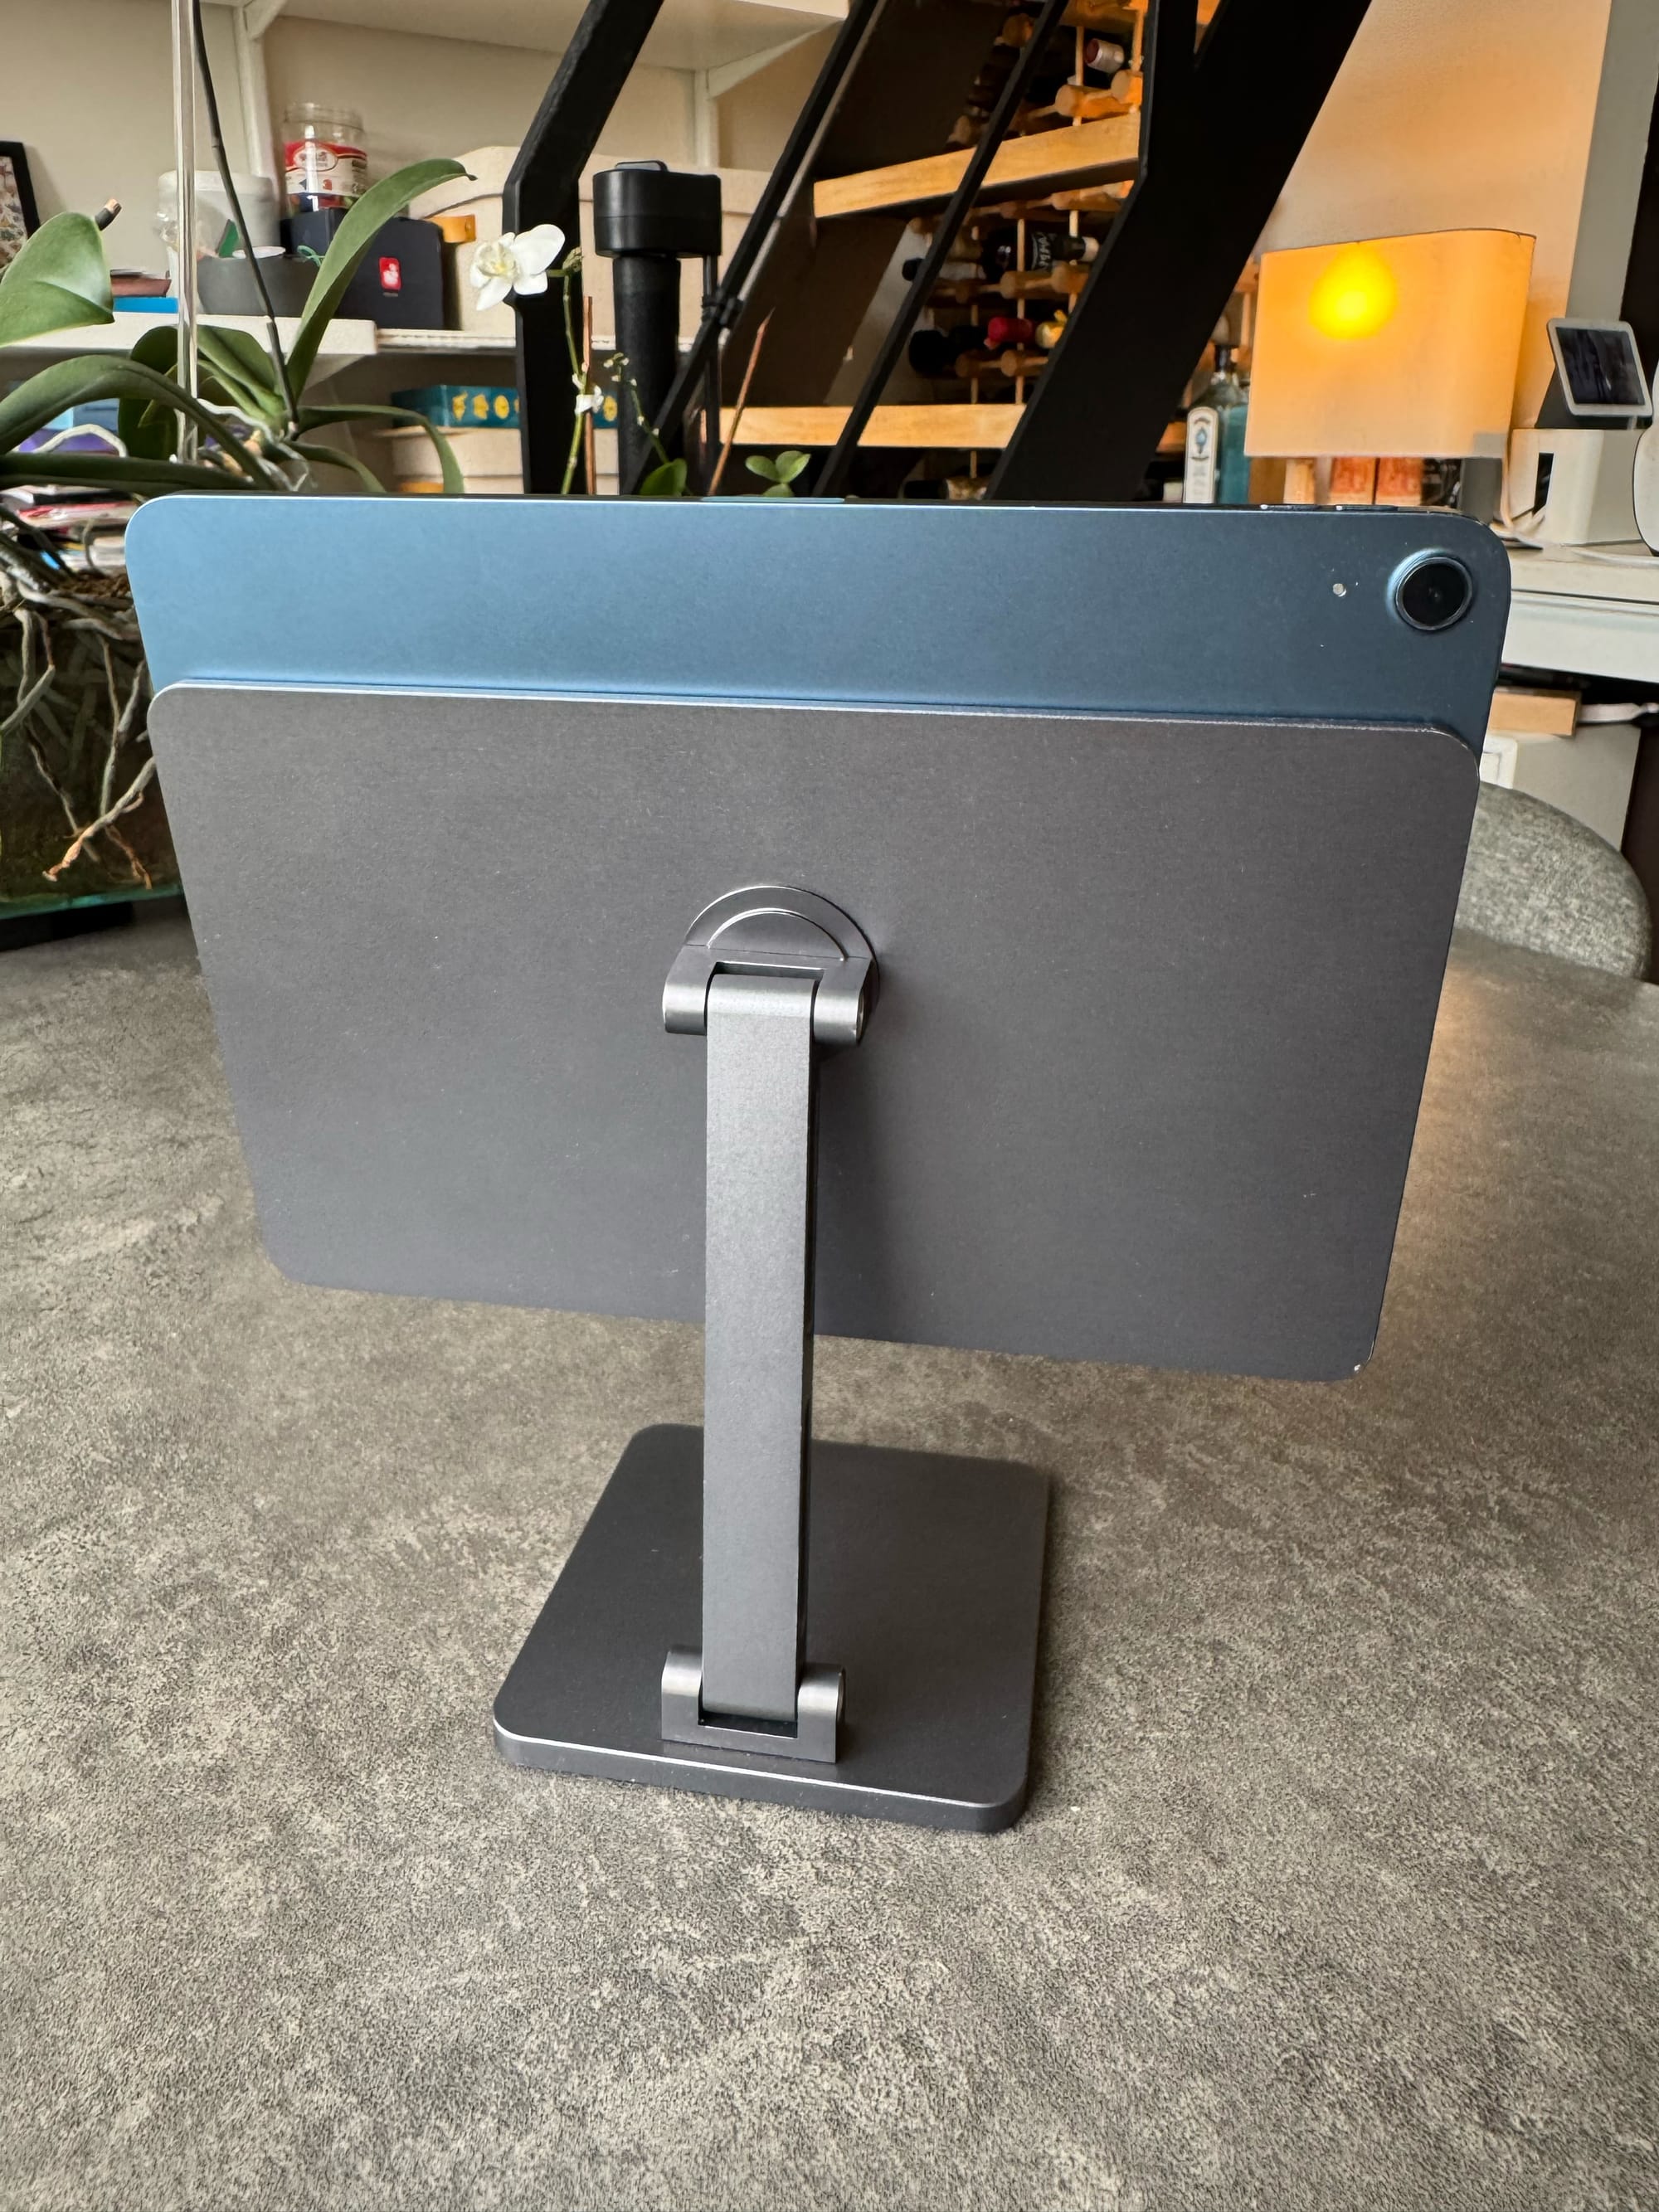
The one I got popped up on amazon for 31.99, and I went for it because all the other branded options were closer to $90, and I didn’t think it was worth that much. The magnets are strong, the stand is quite adjustable, and it’s really fast to just drop your iPad onto the stand.
Keyboard
My current daily driver is the Keebio Cepstrum keyboard. It’s low-profile, the keys don't require a ton of pressure to activate, and I can place it at any angle I want. Combined with the wrist pads I use, it’s extremely comfortable, but it can take up a lot of space in a bag for travel.
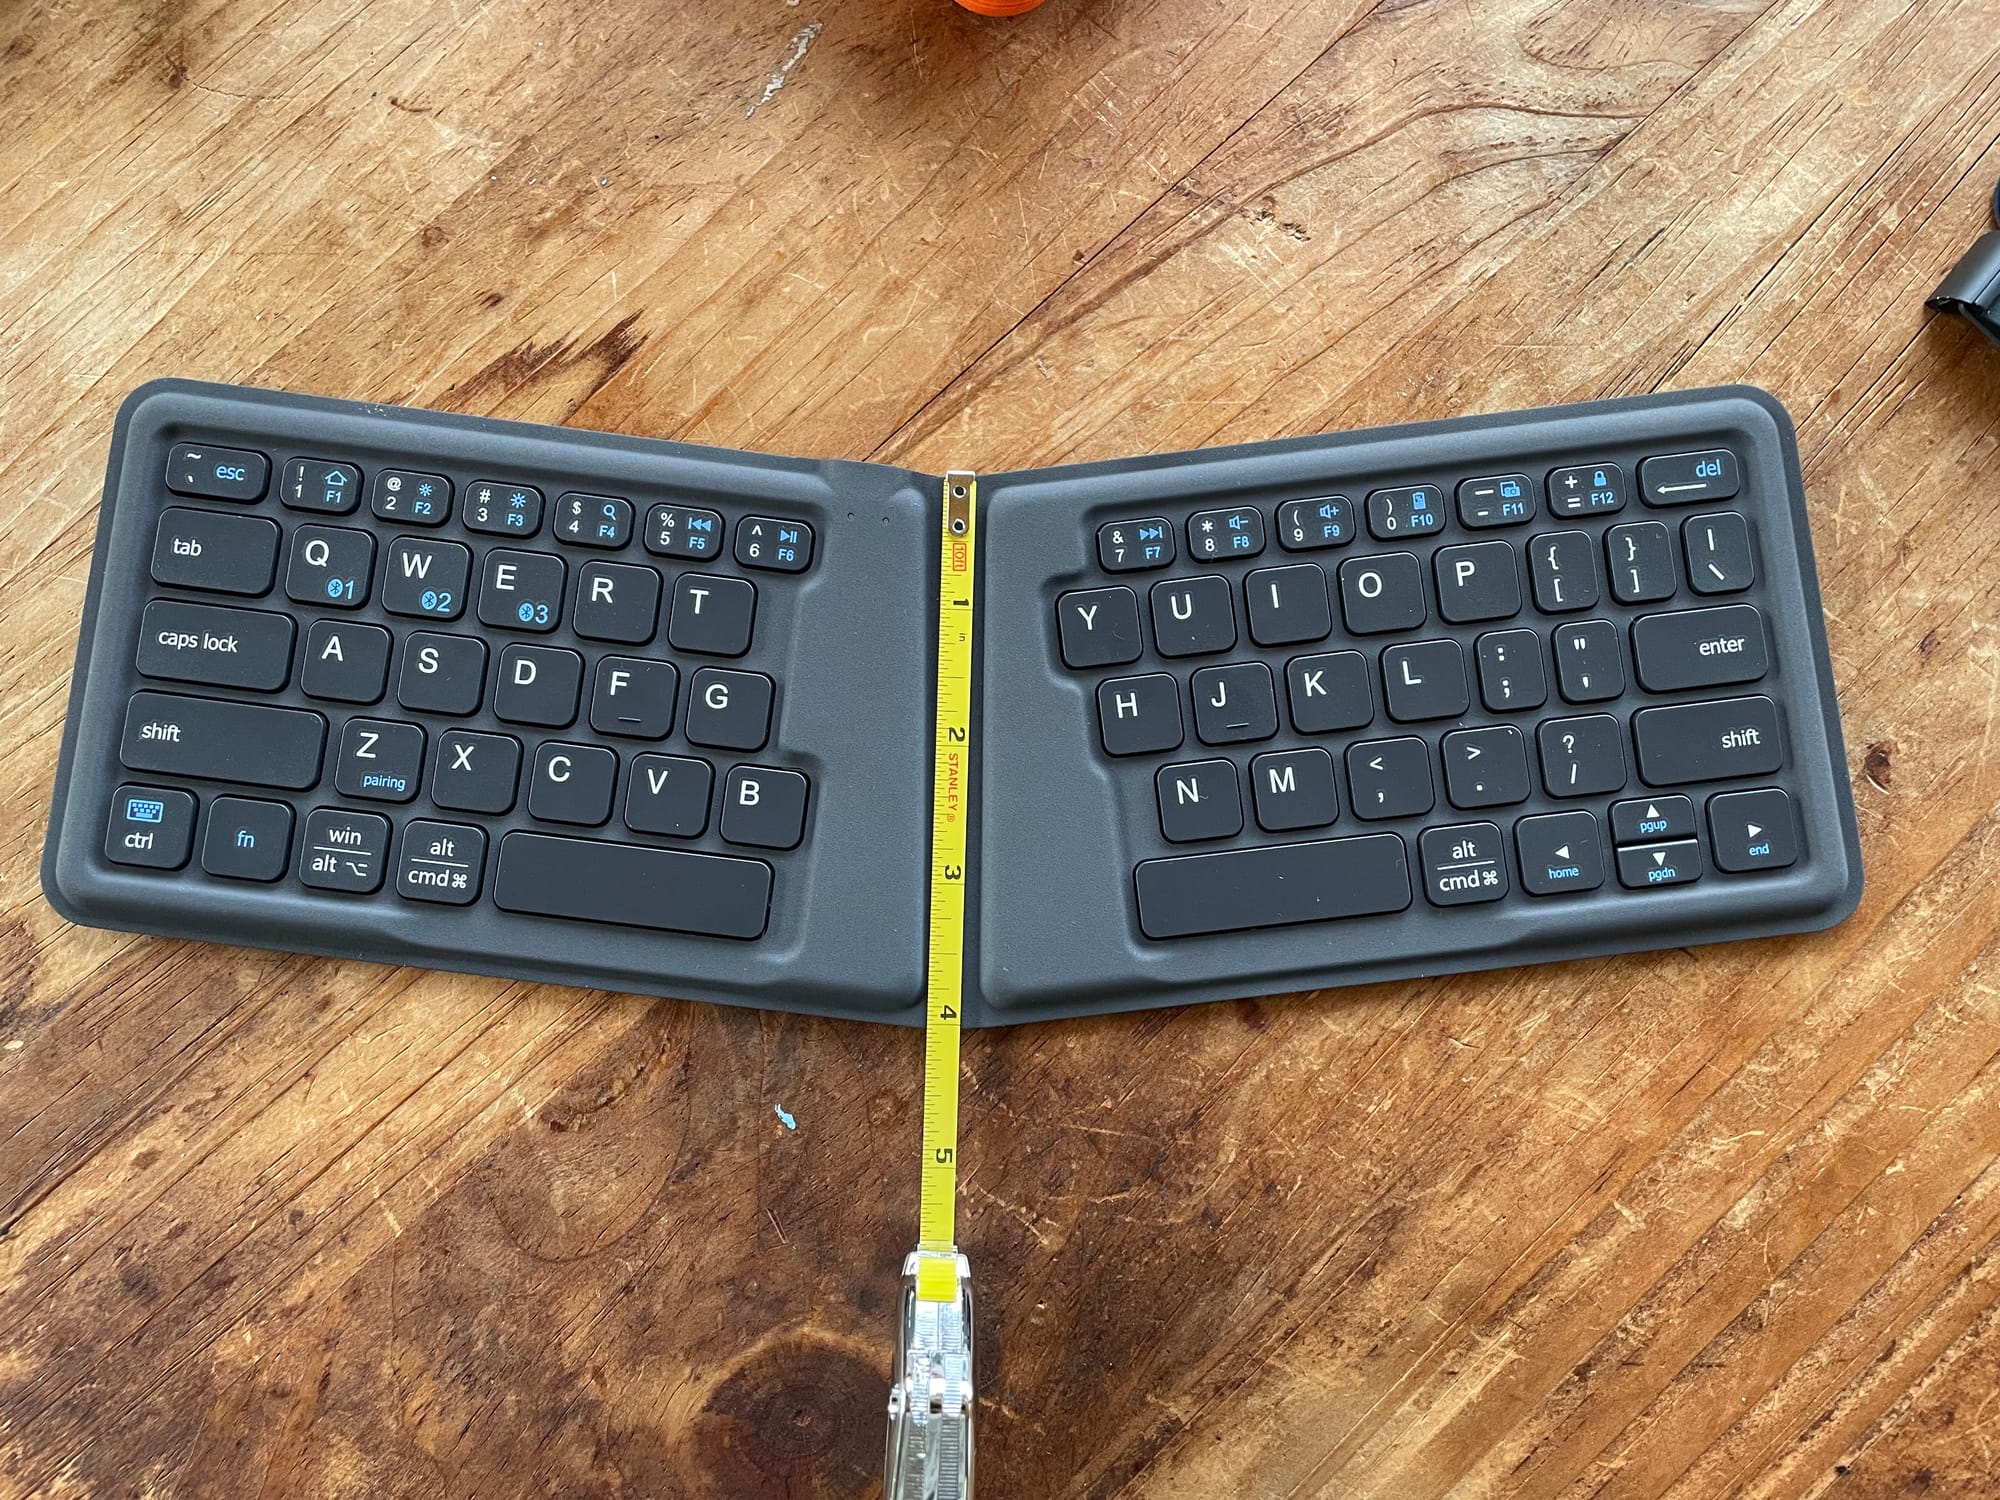
The best alternative I’ve found is the iClever folding split keyboard. It packs down flat, so it’s easy to travel with. The compromise is that the travel on the keys is minimal so it’s not super comfortable to type one. The split is nice because it gives you an angle and allows you to open up your shoulders, and you don't feel as cramped as if you were typing on a laptop keyboard or a Magic Keyboard.
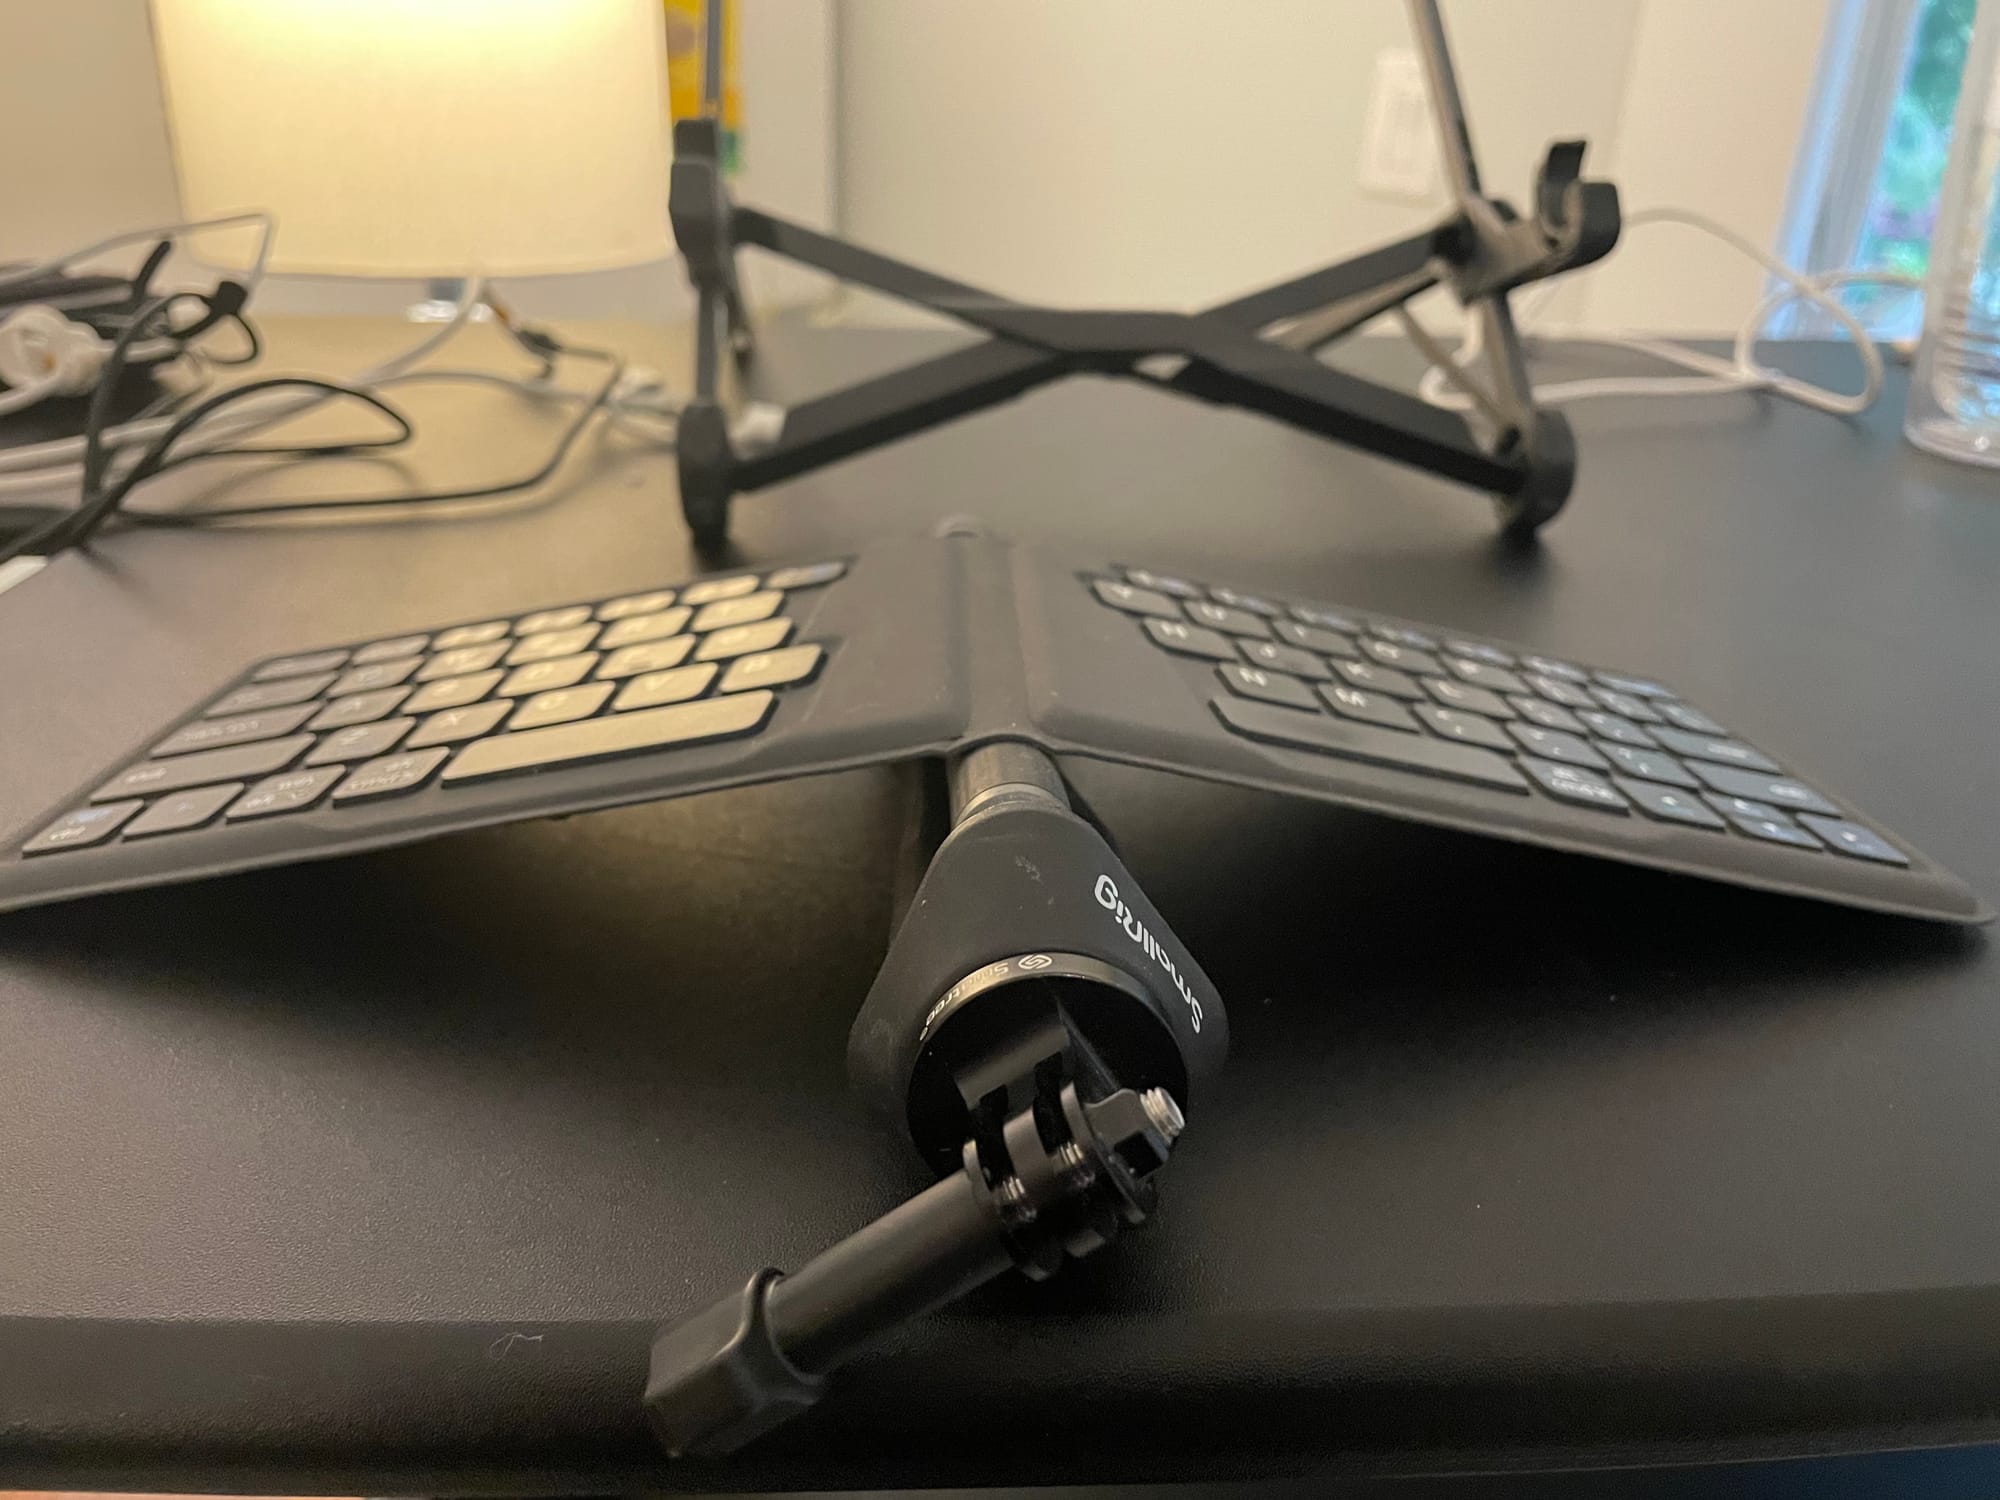
The bend in the keyboard also allows you to prop something underneath it to give it some tenting and some small amount of incline, which is pleasant on the wrists. I've stuffed anything from a tripod, to a couple of SSDs underneath it. I also 3D printed a lift kit, but it's too big and cumbersome to travel with.
Standing Desk
This isn’t really a lightweight travel option, but if you’re driving somewhere and staying for a few weeks, it's the lightest option that feels like a full-blown standing desk. This would also work if you’re working out of someone else’s office for a temporary amount of time.
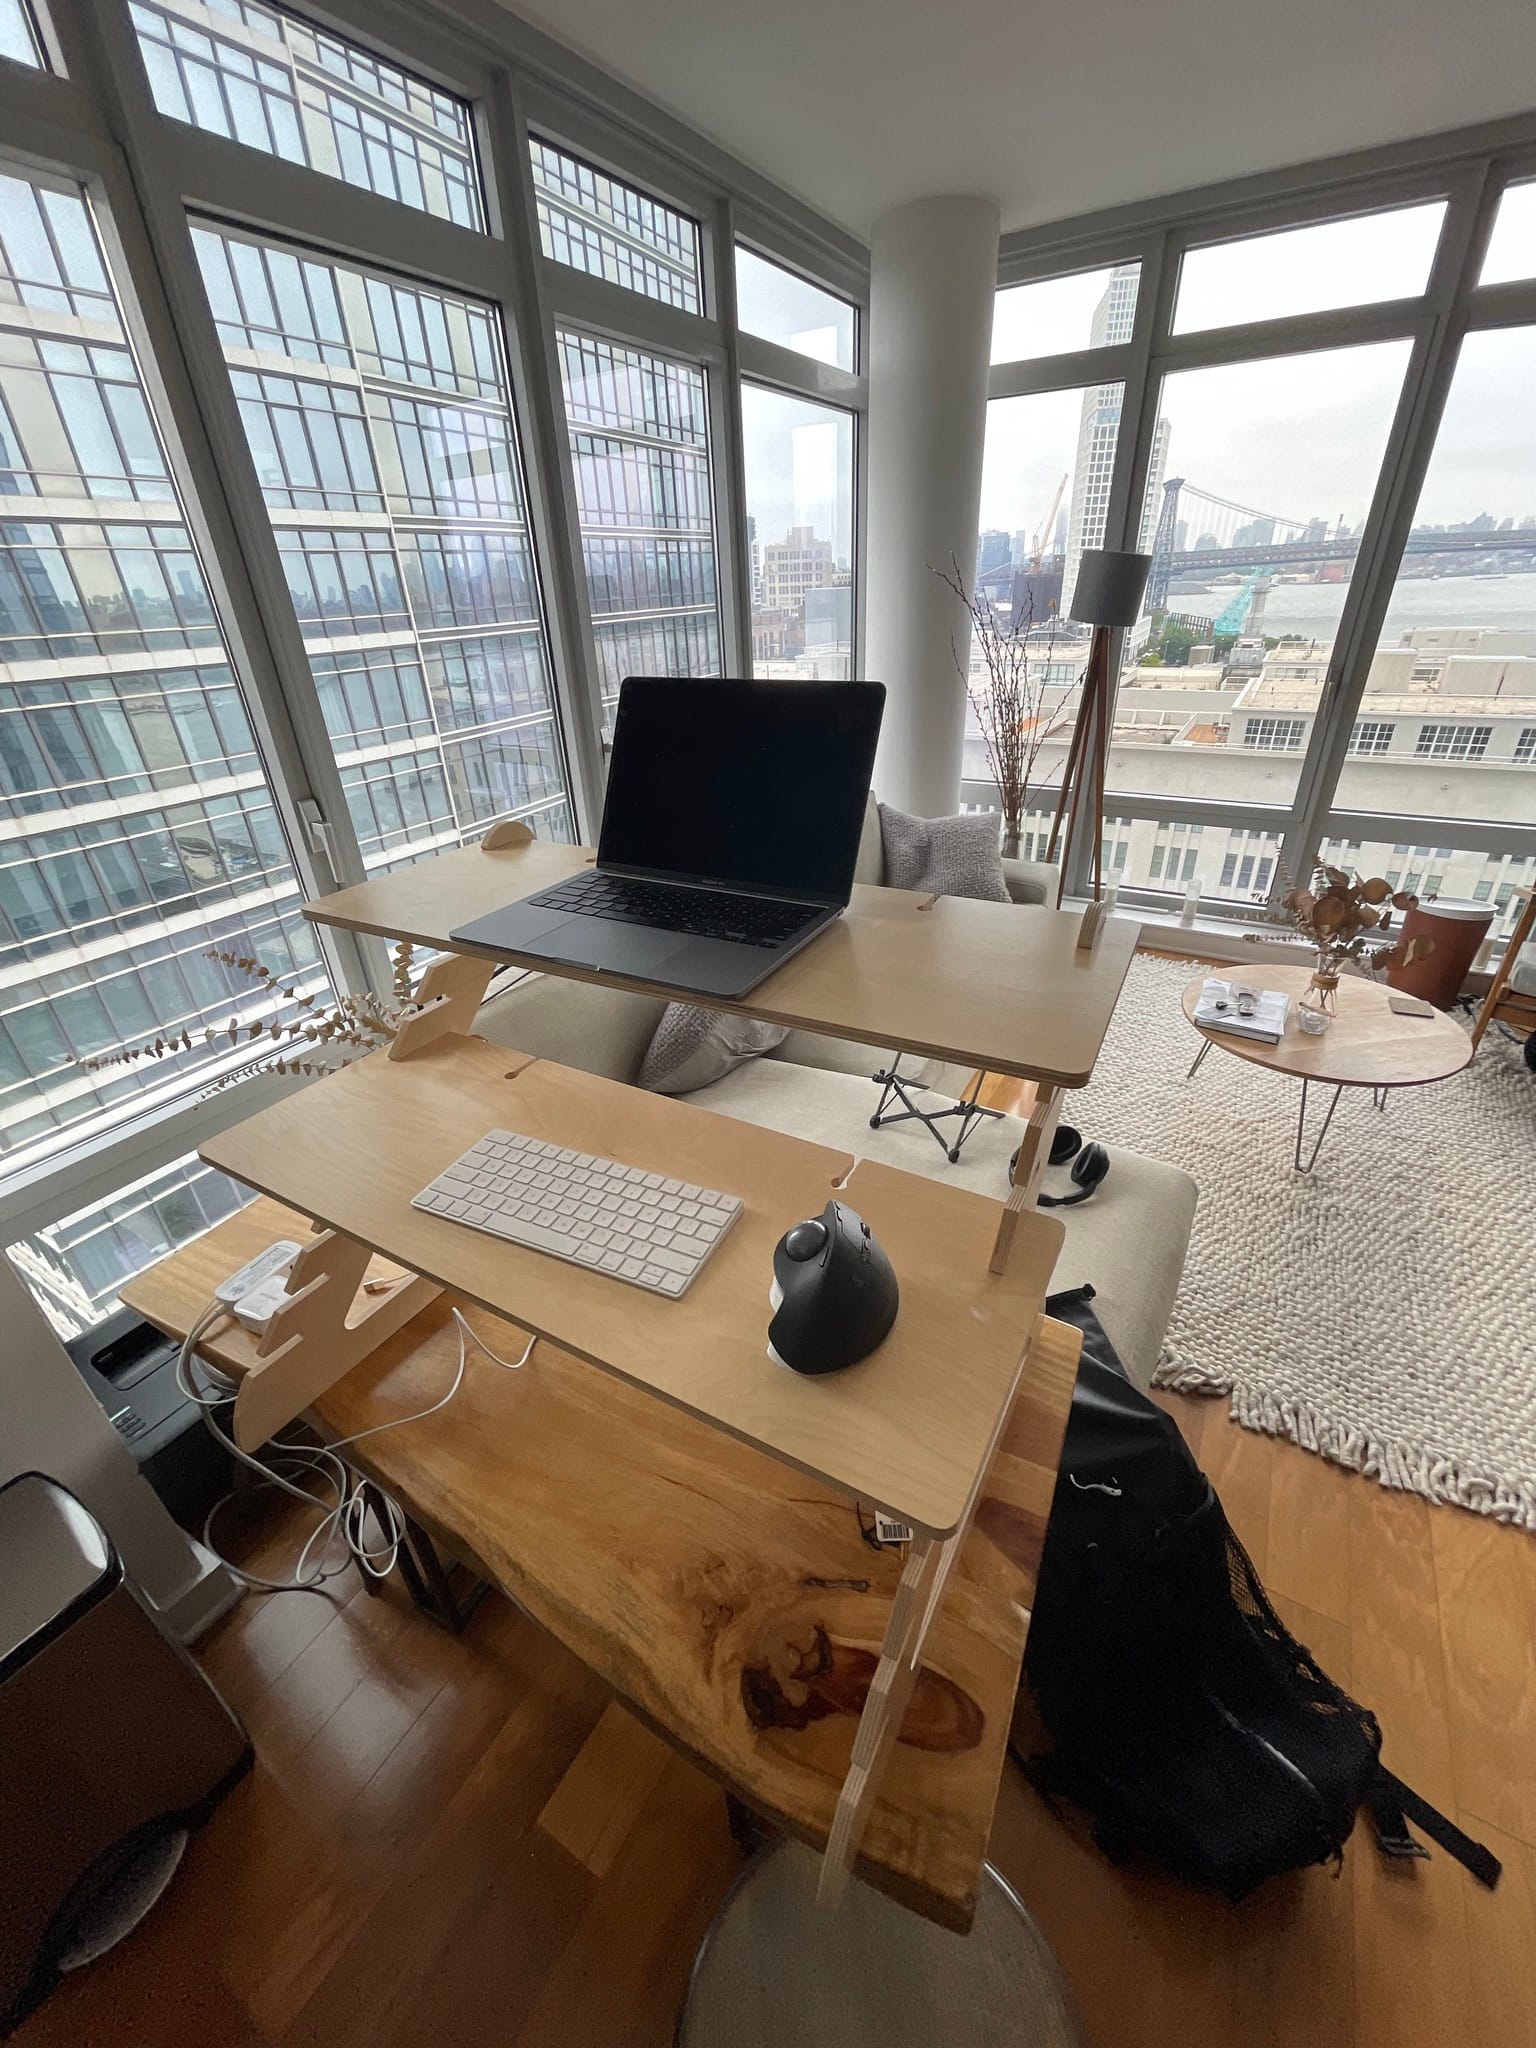
The best thing about this ready desk is that it packs super flat, since it's basically just slim pressed wood. When assembled it gives you quite a range of adjustability, and it provides enough desktop space for two monitors. Ready desk seems to be a victim of the pandemic, but here’s a similar alternative.
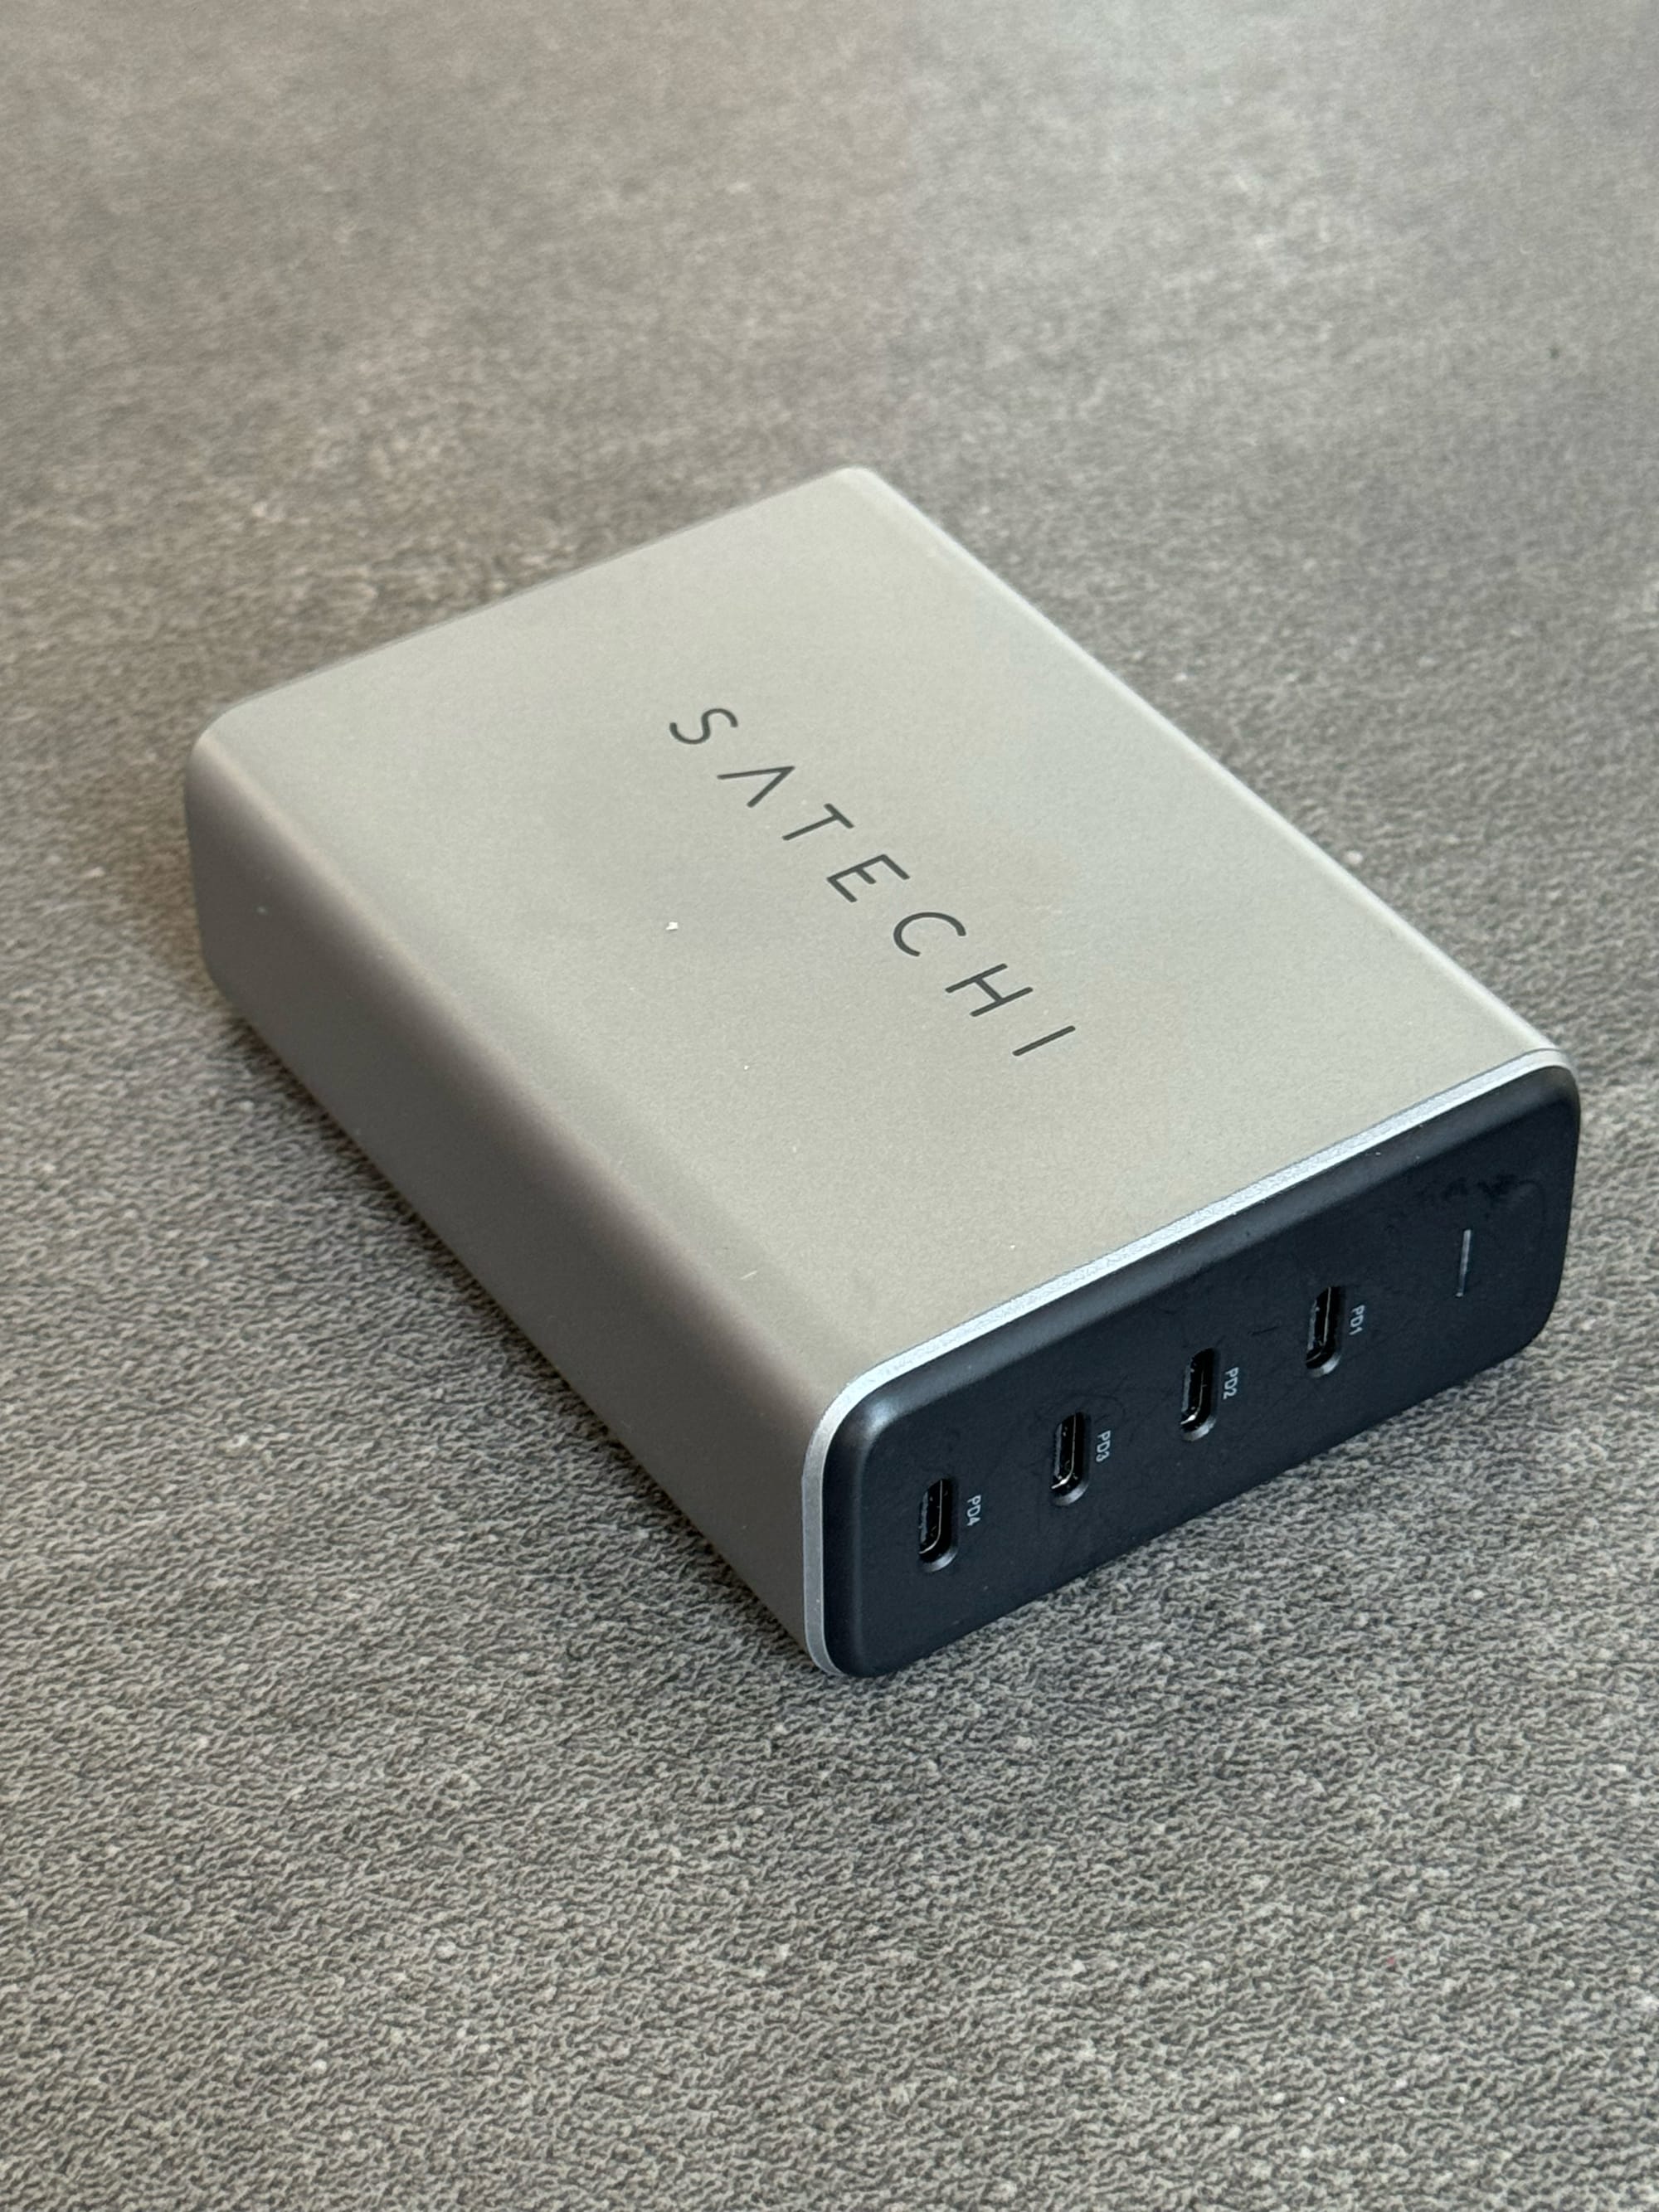
Charger
To power everything in this setup, I need a good charger and possibly an extension cord. Over time, I’ve learned that getting a charging station where every port can do 100w just creates less room for confusion for everyone in the house. I also prefer that the charging station has a cable that goes to the wall (rather than plugging directly into wall), to act as an extension cord without requiring me to carry something else on the trip.
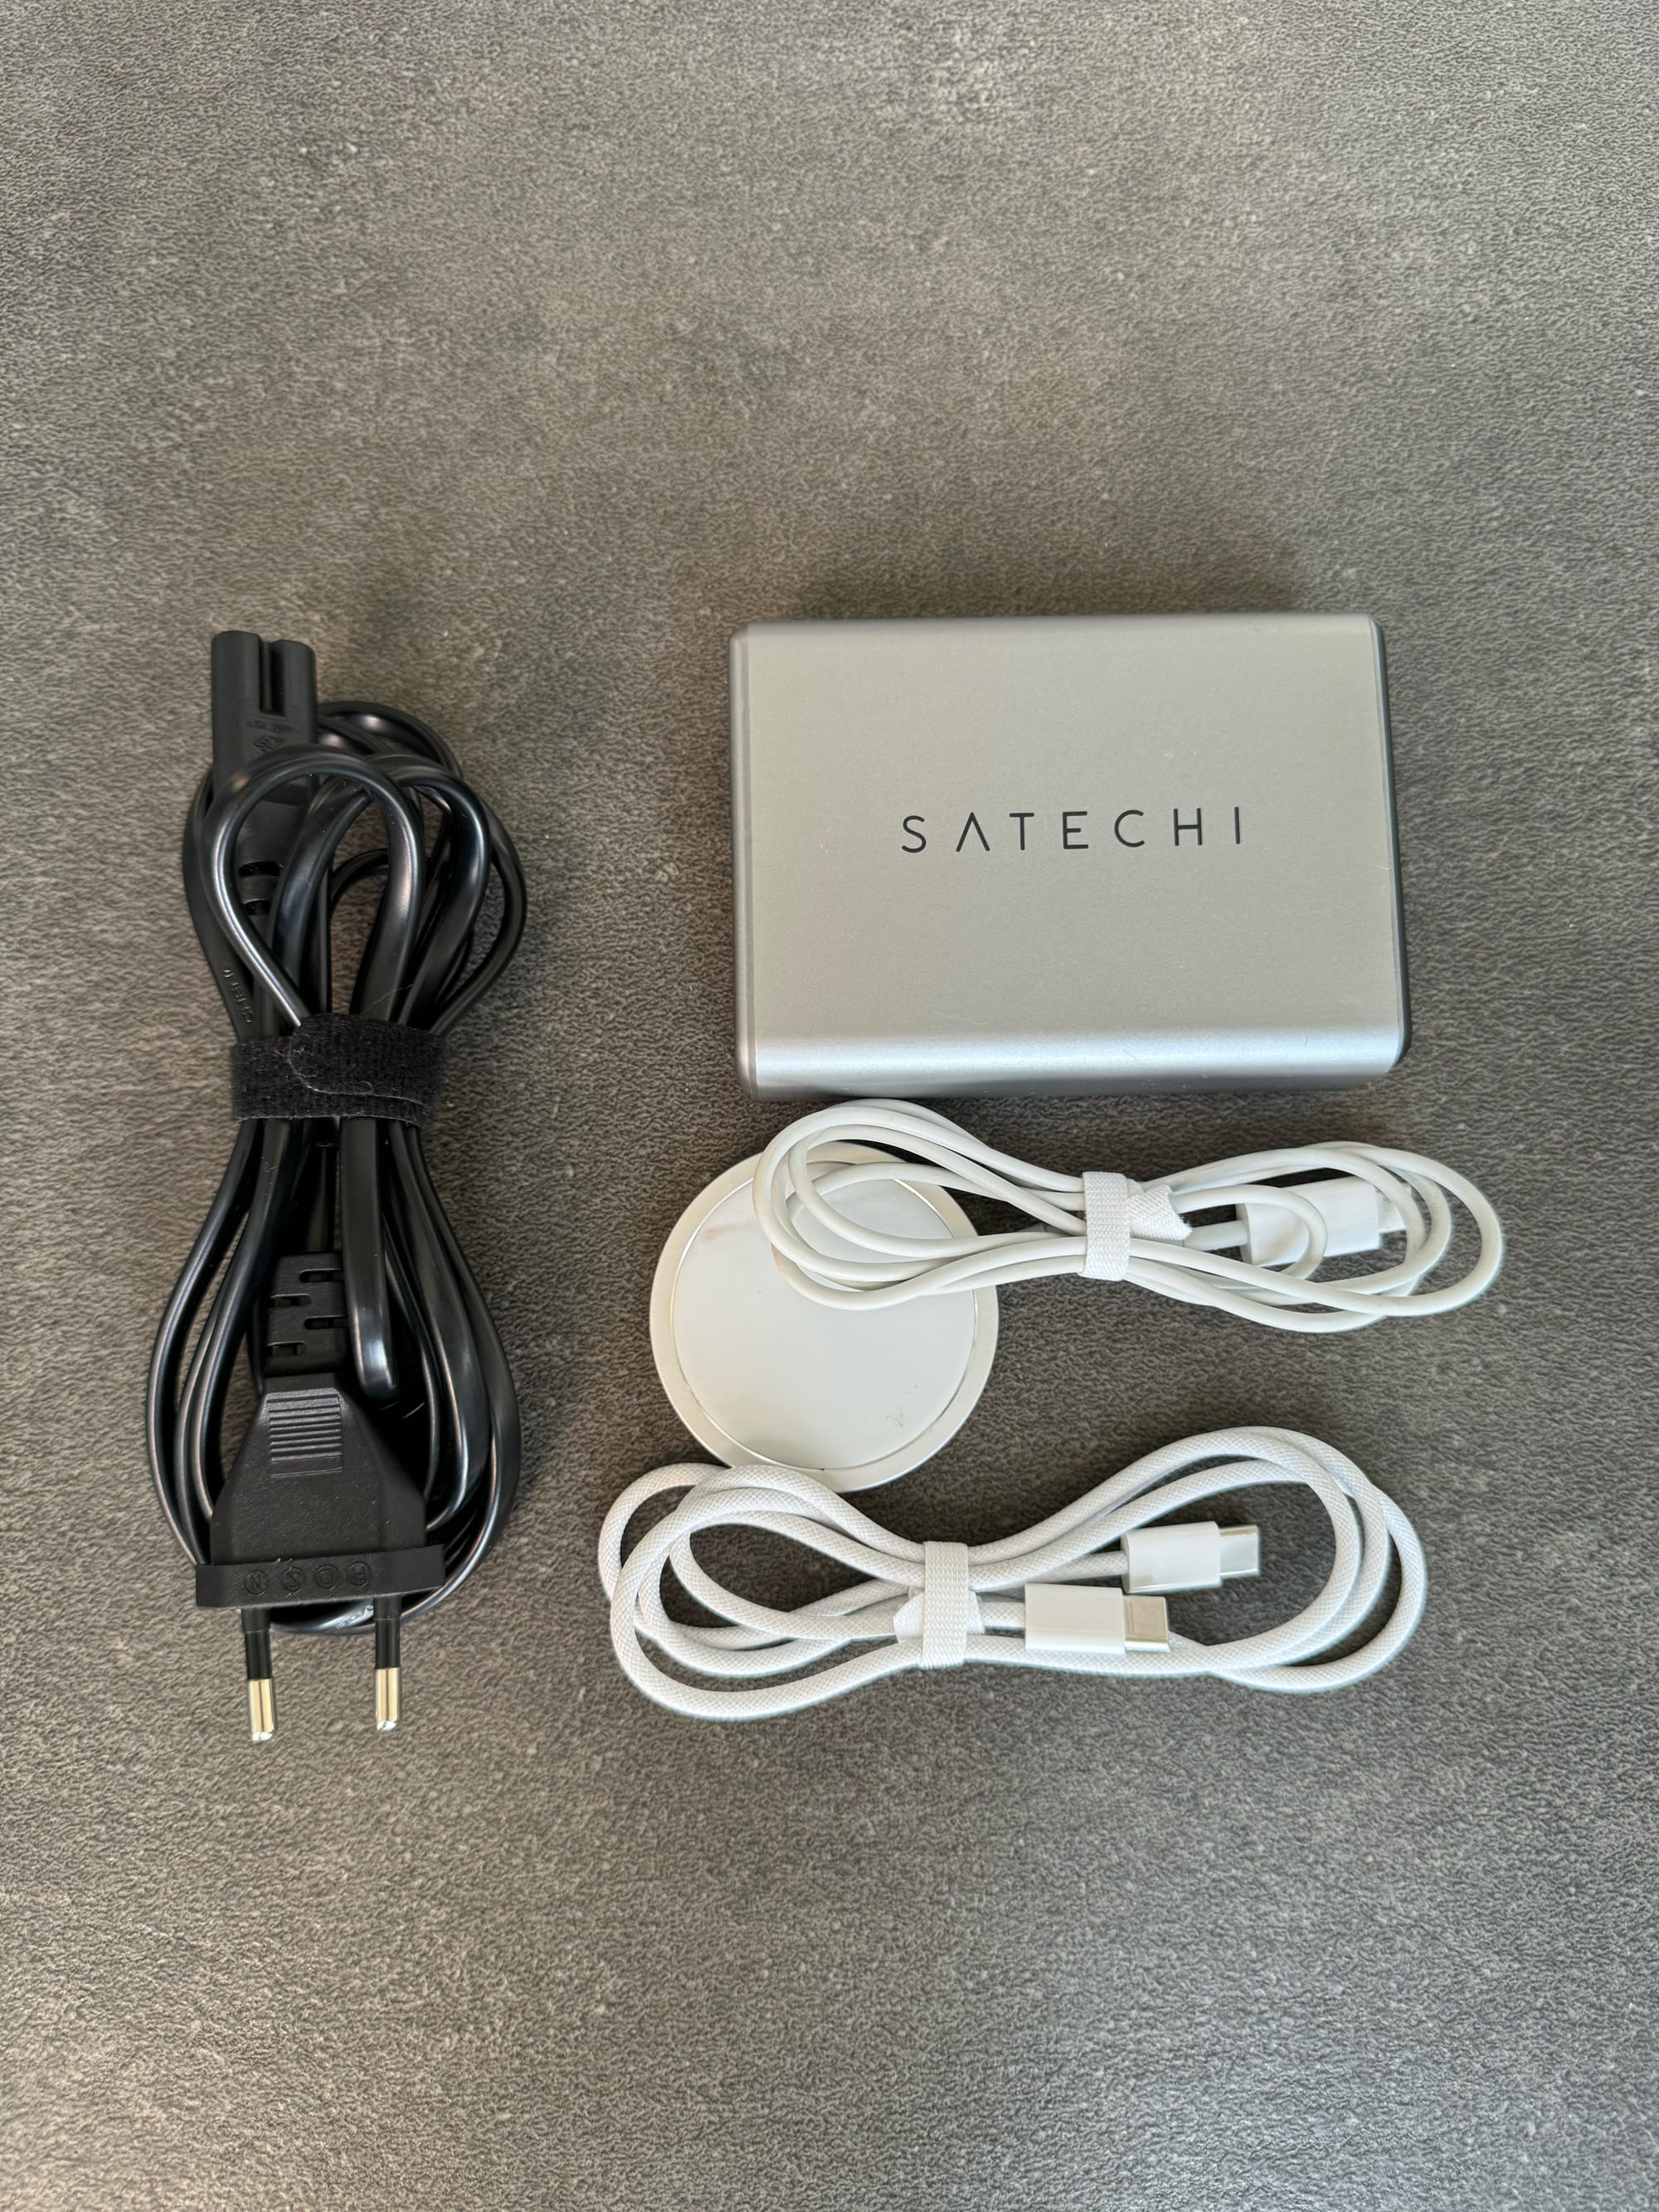
This Satechi can power 4 devices via usb-c at 100w, and it doesn’t ever get too warm. The other nice little hack I’ve done is to buy a separate cable for Europe, in case you travel abroad. It’s one less travel adapter you have to carry with you.
As a back-up, this Anker 547 charger is cheaper, and can power a laptop on two of its ports.
The mouse
This is probably the item in this post that I’m the most mixed over. My daily driver is the Logitech Mx ergo with a 3d printed 40 degree riser, and it completely removes any wrist discomfort. The MX ergo forces you to use your thumb for all navigation, where as a normal mouse or trackpad require a high volume of micro wrist movements.
This MX ergo setup is comfortable, but it’s not compact, so when I’m traveling light, I end up taking the Apple Magic Mouse. I use the Magic Mouse first because I already own one, and second because it is minuscule and packable. Where it falls short is that it’s not super ergonomic, the functionality is limited by its lack of buttons, and most annoyingly you can't use it while charging.
Router
Nobody likes troubleshooting Wi-Fi issues, much less Wi-Fi issues while traveling. Having a small travel router with you, gives you a range of possibilities that can help you trouble shoot most issues.
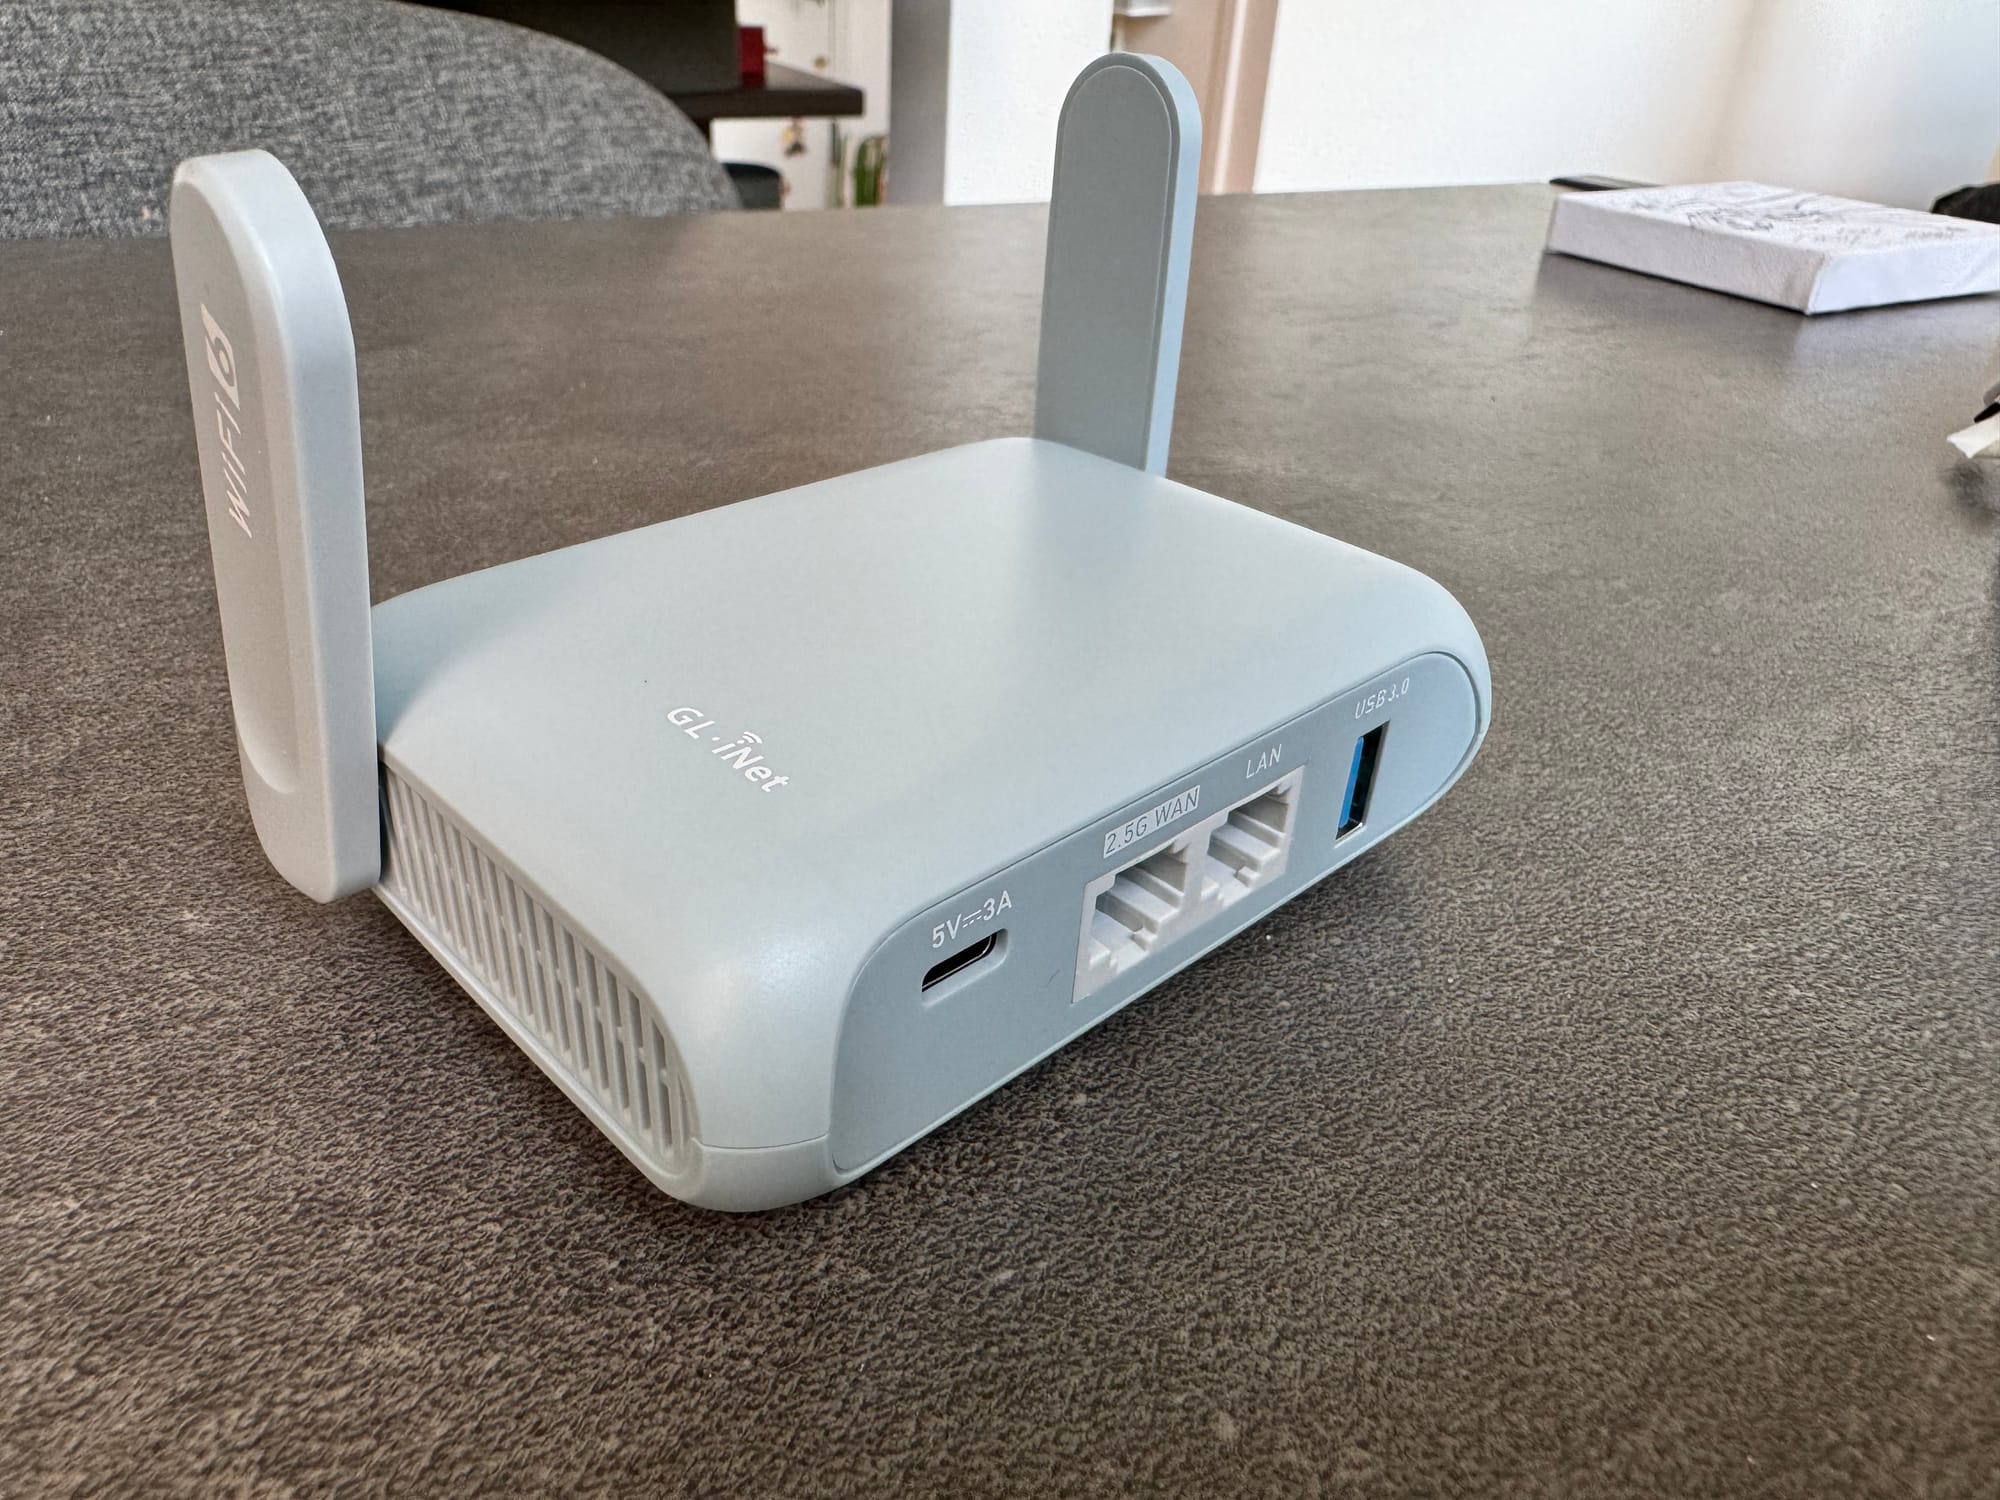
You can replace an old slow router with this more modern faster travel router. Or you can use this router to extend range to different parts of the house or hotel room that might not get great reception. The other major option this opens up is the ability to tether your 5g phone to the router, and then use the router for all your Wi-Fi devices.
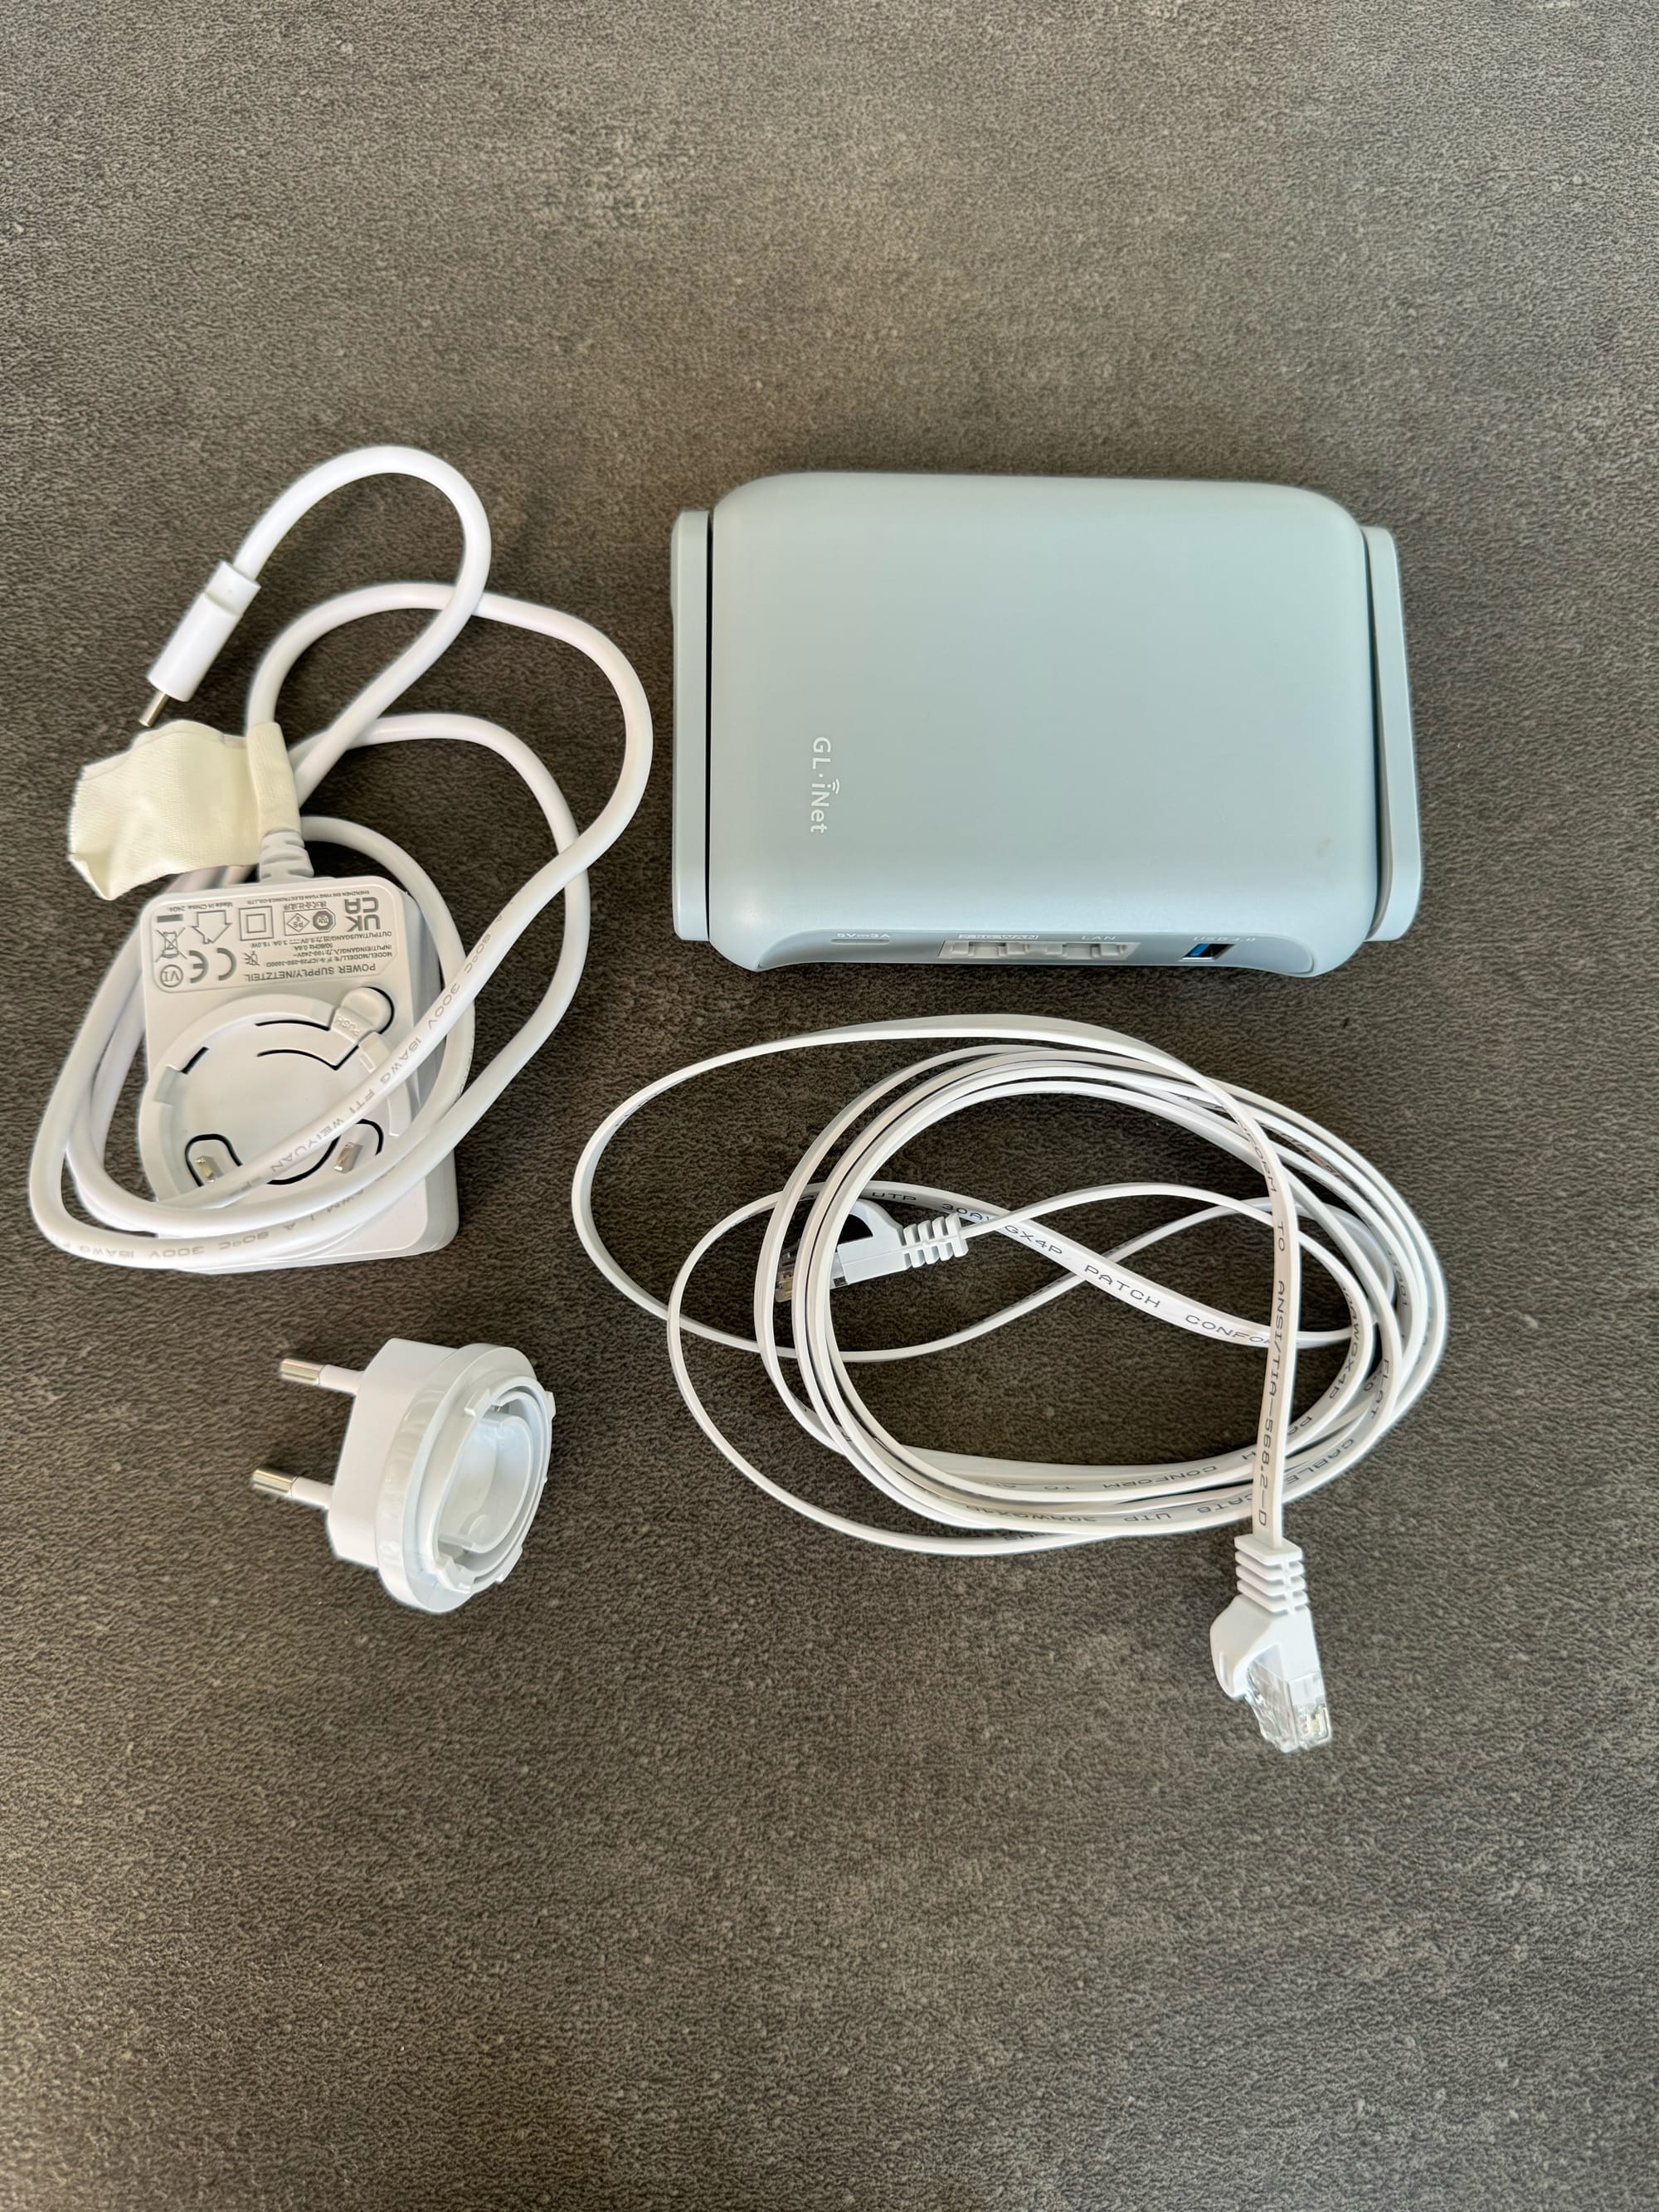
The one tip I have is to travel with 30ft of flat ethernet cable. This allows you to handle any strange layout issues you might come up against. I was once in a VRBO rental where there were two separate buildings on the property, and the rooms in the back could not get any WiFi. The 30 foot cable helped me move the router to a place where its range could work for everyone.
Portable battery
To power everything while on the go, I’ve been using this Anker power bank. It lasts long enough to power my laptop on most long flights, along with topping up my phone and iPad. When I’m not traveling, it’ll power things like the router or cameras if I’m not within range of a wall plug to get power. I’m sure there are fancier versions out there, but I like this shape as it’s flatter. Some new models are a bulkier square shape that poke out more in my bag. Unfortunately, the model I have is discontinued.
Conclusion
Combining travel with lots of time on a computer is a necessary evil that comes with the increased flexibility of being able to work from anywhere. Hopefully, these tips help everyone reduce their discomfort when spending long hours working in temporary workspaces. If you’ve got any tips or gear that would fit into this workflow, please let me know here.